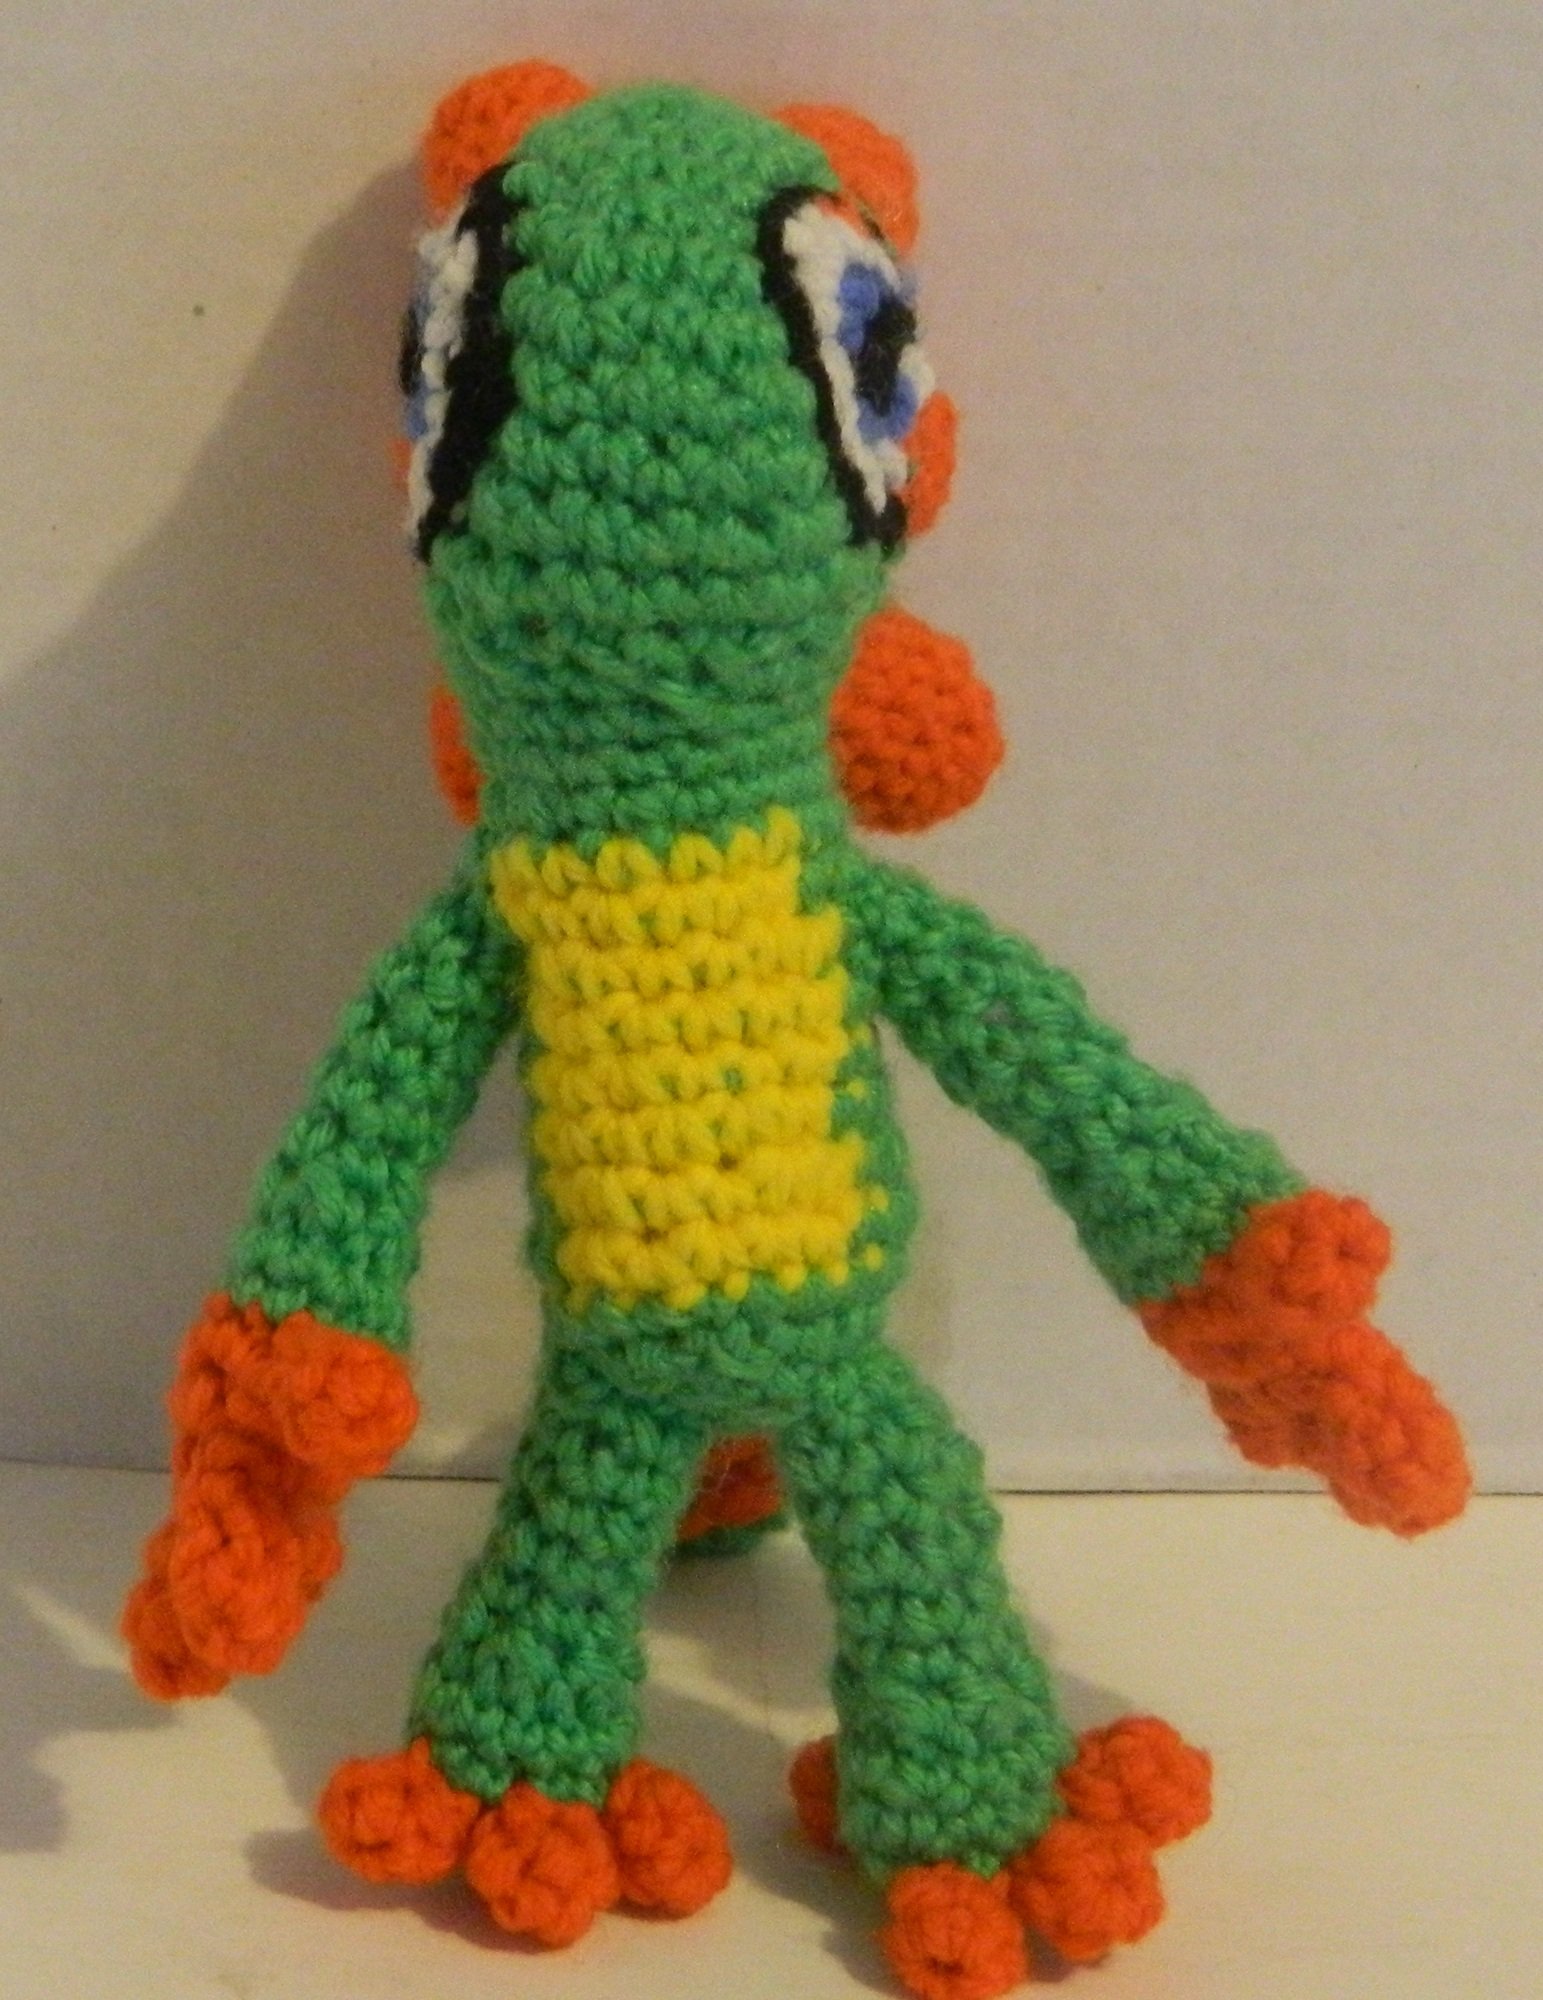

In the early days of 3D video games one of the most popular video game genres was the “cartoon” platformer. While the genre was quite popular in the mid 1990s and into the 2000s, the genre has been pretty dormant recently. Last week the long awaited indie video game Yooka-Laylee was released which was created by veterans from Rare who helped create the Donkey Kong and Banjo-Kazooie franchises. In Yooka-Laylee you control a duo of characters aptly named Yooka and Laylee.
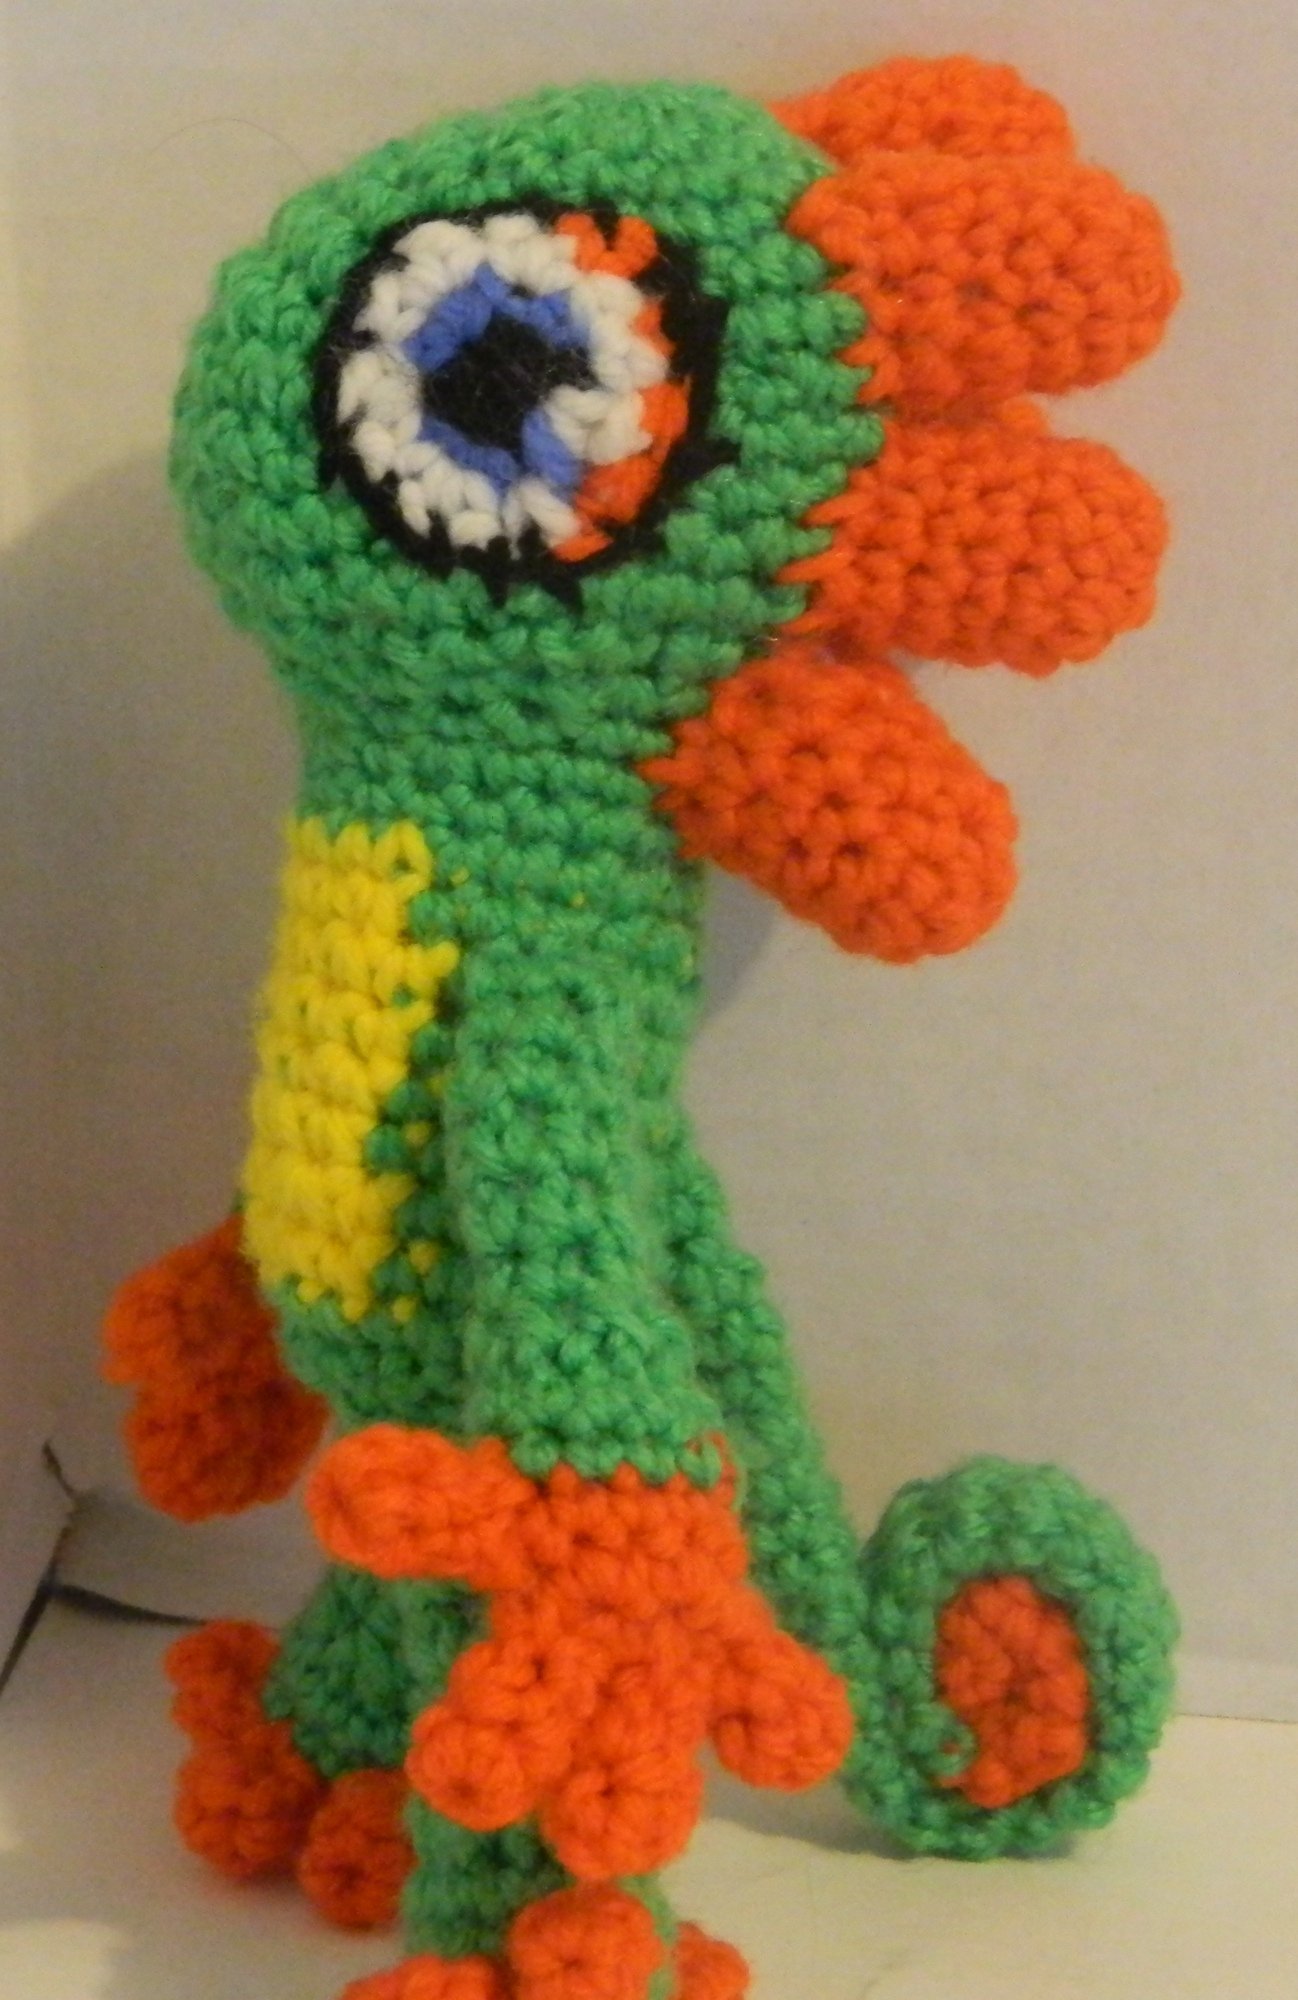
This pattern creates a Yooka amigurumi that stands approximately seven and a half inches tall. I would classify this pattern as moderately difficult due to the number of parts that need to be created to complete the pattern.
Note: This pattern is provided for free so I would appreciate that it not be used for commercial use. You may not copy this pattern and then try to sell it. I would appreciate that this pattern not be copied and posted in its’ entirety on other websites. Feel free to post images of your completed works wherever you want but a link back to this page would be appreciated.
What Do You Need to Know
Difficulty: Light-Moderate
In order to follow the Yooka pattern you will need to know how to do the following:
- Slipknot | Tutorial
- Chain Stitch (CH) | Tutorial
- Single Crochet (SC) | Tutorial
- Increase (INC) | Tutorial
- Decrease (DEC) | Tutorial
- Slip Stitch (SL) | Tutorial
- Fastening Off | Tutorial
- Changing Colors | Tutorial
What You Need
- Green Yarn Buy on Amazon
- Orange Yarn Buy on Amazon
- Yellow Yarn Buy on Amazon
- Black Yarn (not a lot) Buy on Amazon
- White Yarn (not a lot) Buy on Amazon
- Blue Yarn (not a lot) Buy on Amazon
- Stuffing Buy on Amazon
- E/4 3.50 MM Crochet Hook Buy on Amazon
- Yarn needle Buy on Amazon
- Stitch markers Buy on Amazon
Pattern
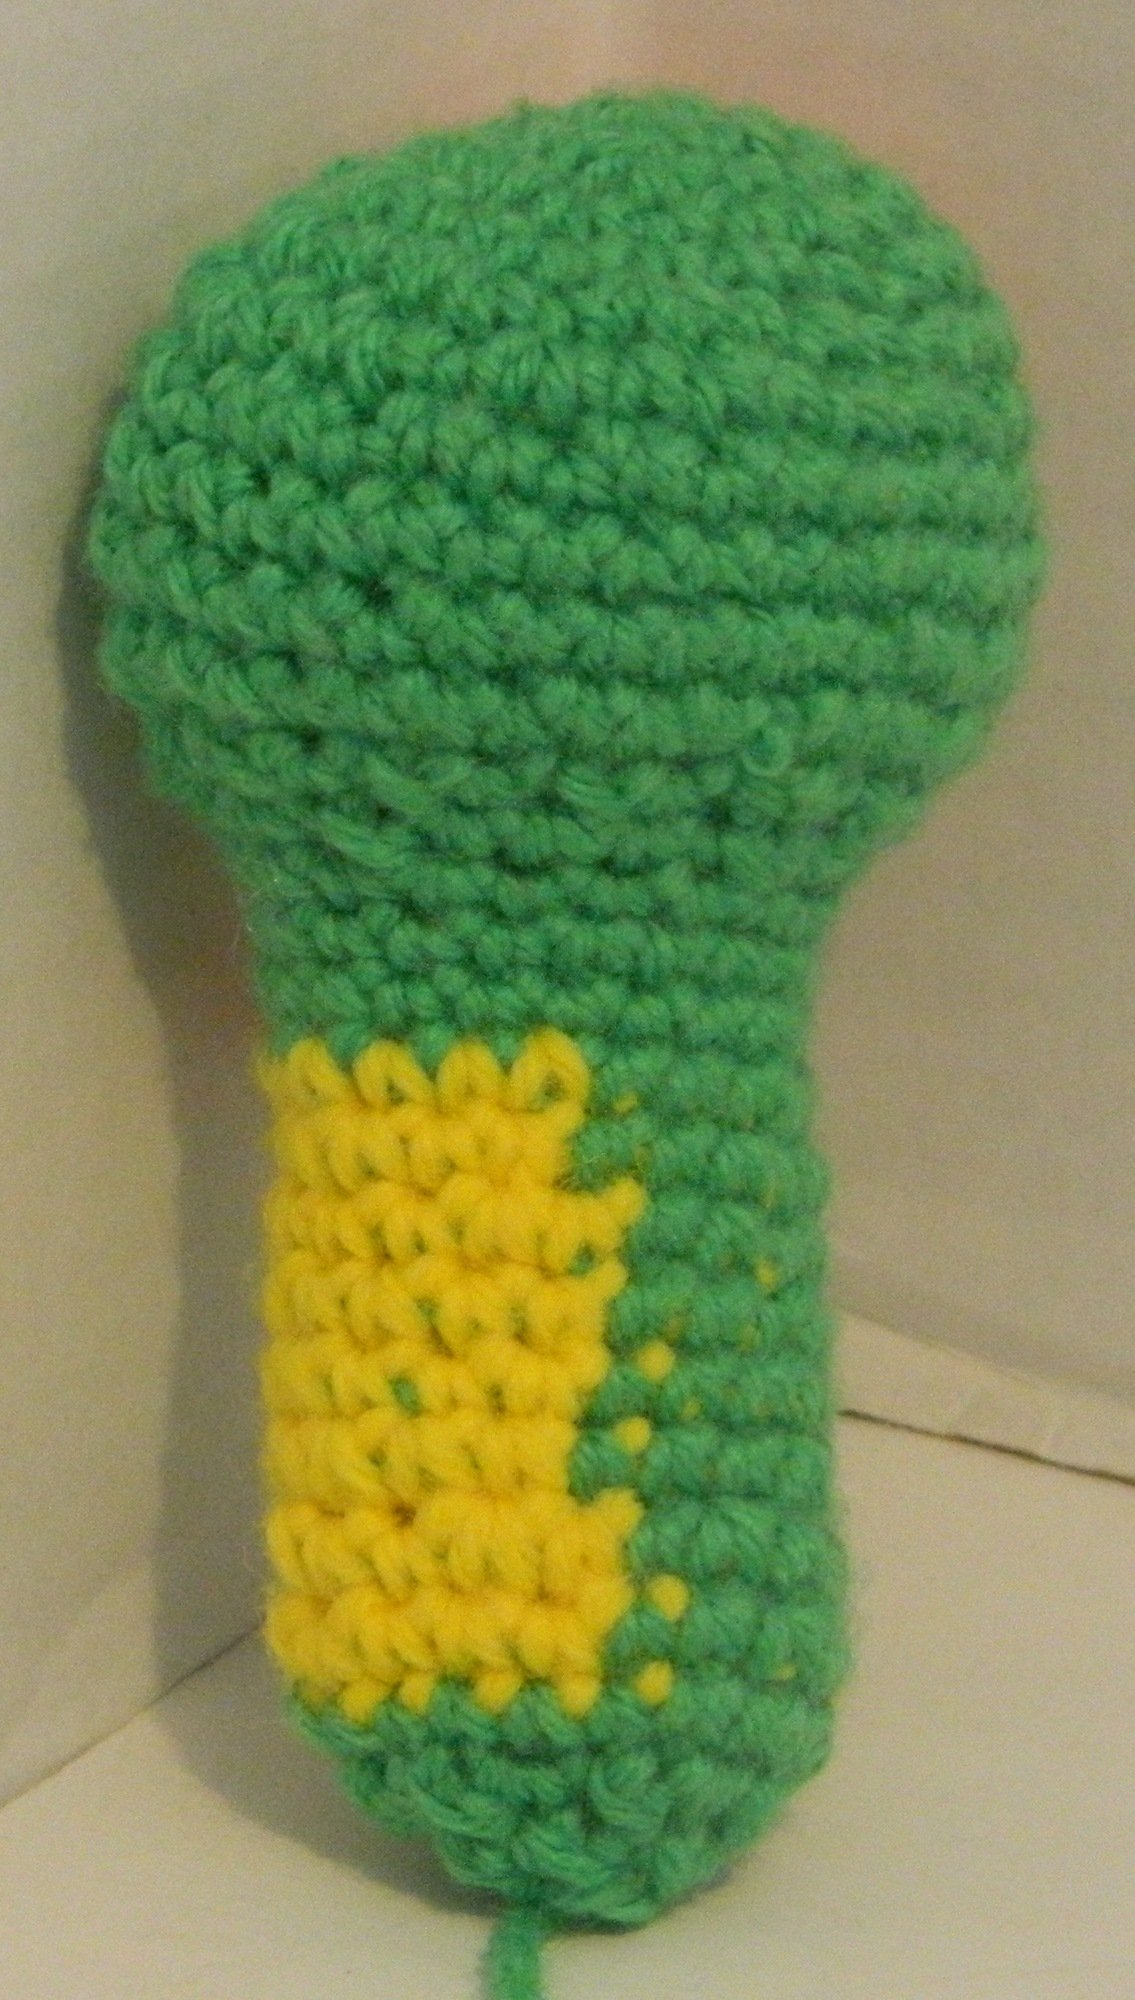
Body
For the body you will be using both green and yellow yarn. For the body you will start with the head using the green yarn.
Round 1: CH x 2 (2 stitches)
Round 2: SC x 6 in the first CH (6 stitches)
Round 3: INC x 6 (12 stitches)
Round 4: | SC, INC | x 6 (18 stitches)
Round 5: | SC, INC, SC | x 6 (24 stitches)
Round 6: INC, SC, INC, SC, INC, SC x 19 (27 stitches)
Round 7: SC, INC, SC, INC, SC, INC, SC x 21 (30 stitches)
Round 8: SC x 2, INC, SC, INC, SC, INC, SC x 23 (33 stitches)
Rounds 9-12: SC x 33
Round 13: | SC, DEC | x 11 (22 stitches)
Round 14: SC, | SC x 3, DEC | x 4, SC (18 stitches)
Rounds 15-17: SC x 18 (18 stitches)
For the next rounds you will be using both the green and yellow yarn.
Round 18: SC x 1 (green), SC x 6 (yellow), SC x 11 (green) (18 stitches)
Rounds 19-20: SC x 2 (green), SC x 6 (yellow), SC x 10 (green) (18 stitches)
Rounds 21-23: SC x 3 (green), SC x 6 (yellow), SC x 9 (green) (18 stitches)
Round 24-25: SC x 4 (green), SC x 6 (yellow), SC x 8 (green) (18 stitches)
For the rest of the body you will use the green yarn.
Round 26: SC x 18 (18 stitches)
Round 27: | SC, DEC | x 6 (12 stitches)
Round 28: DEC x 6 (6 stitches)
Fasten off leaving enough yarn to sew up the bottom of the body. Before sewing up the bottom, stuff the body with the desired amount of stuffing.
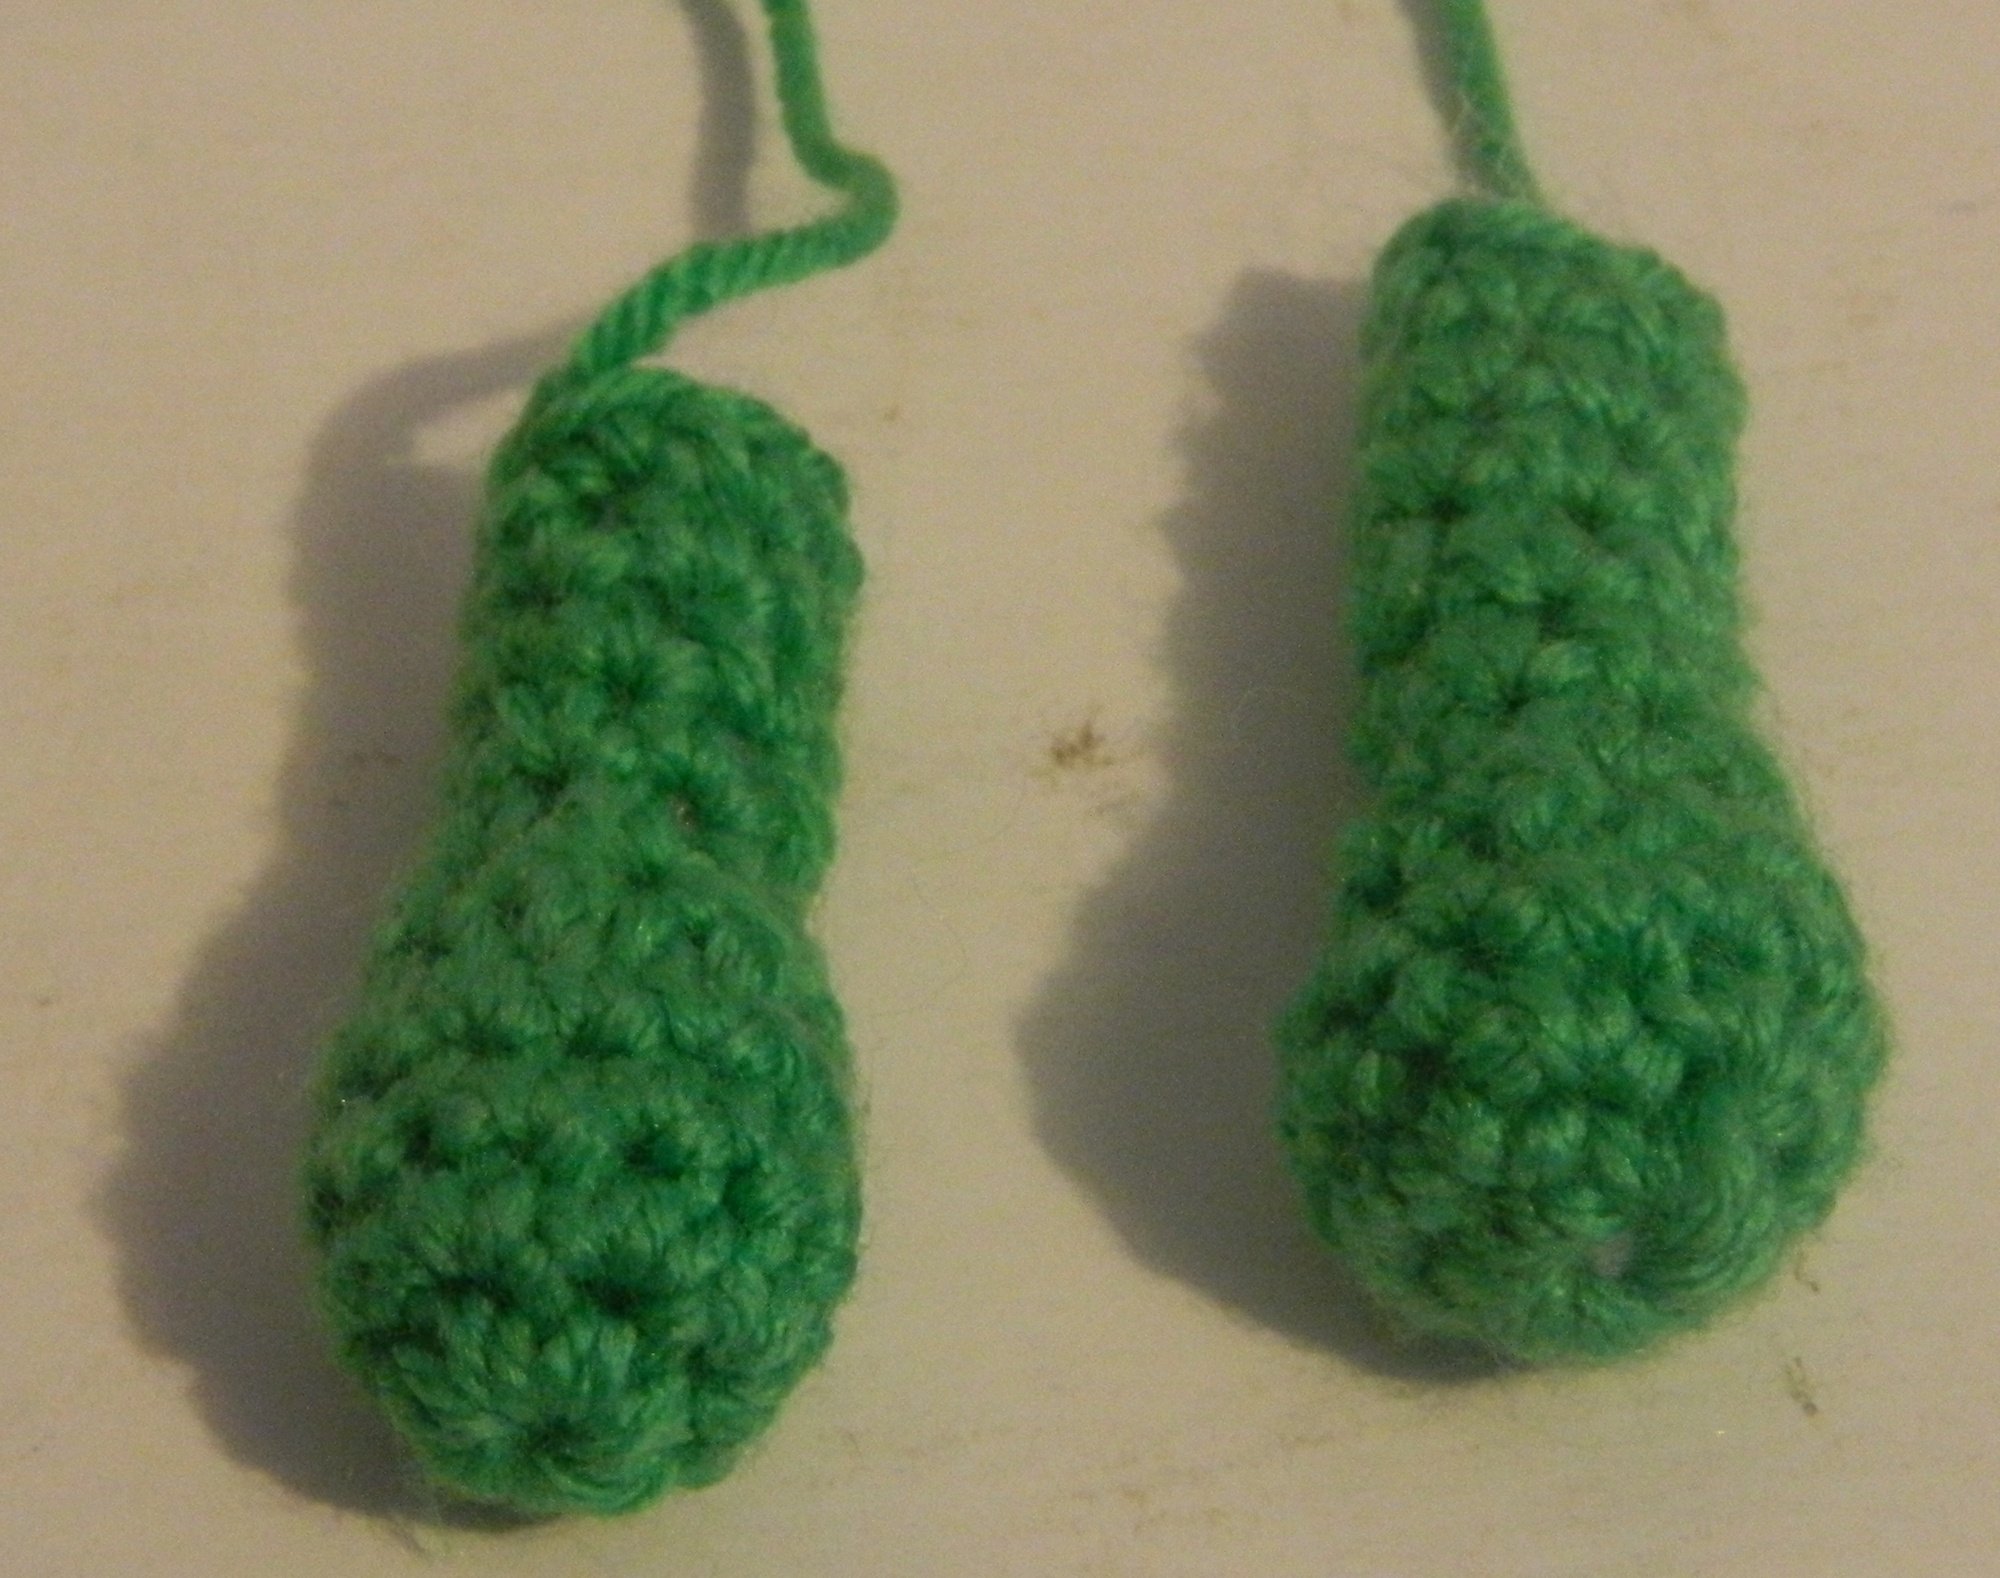
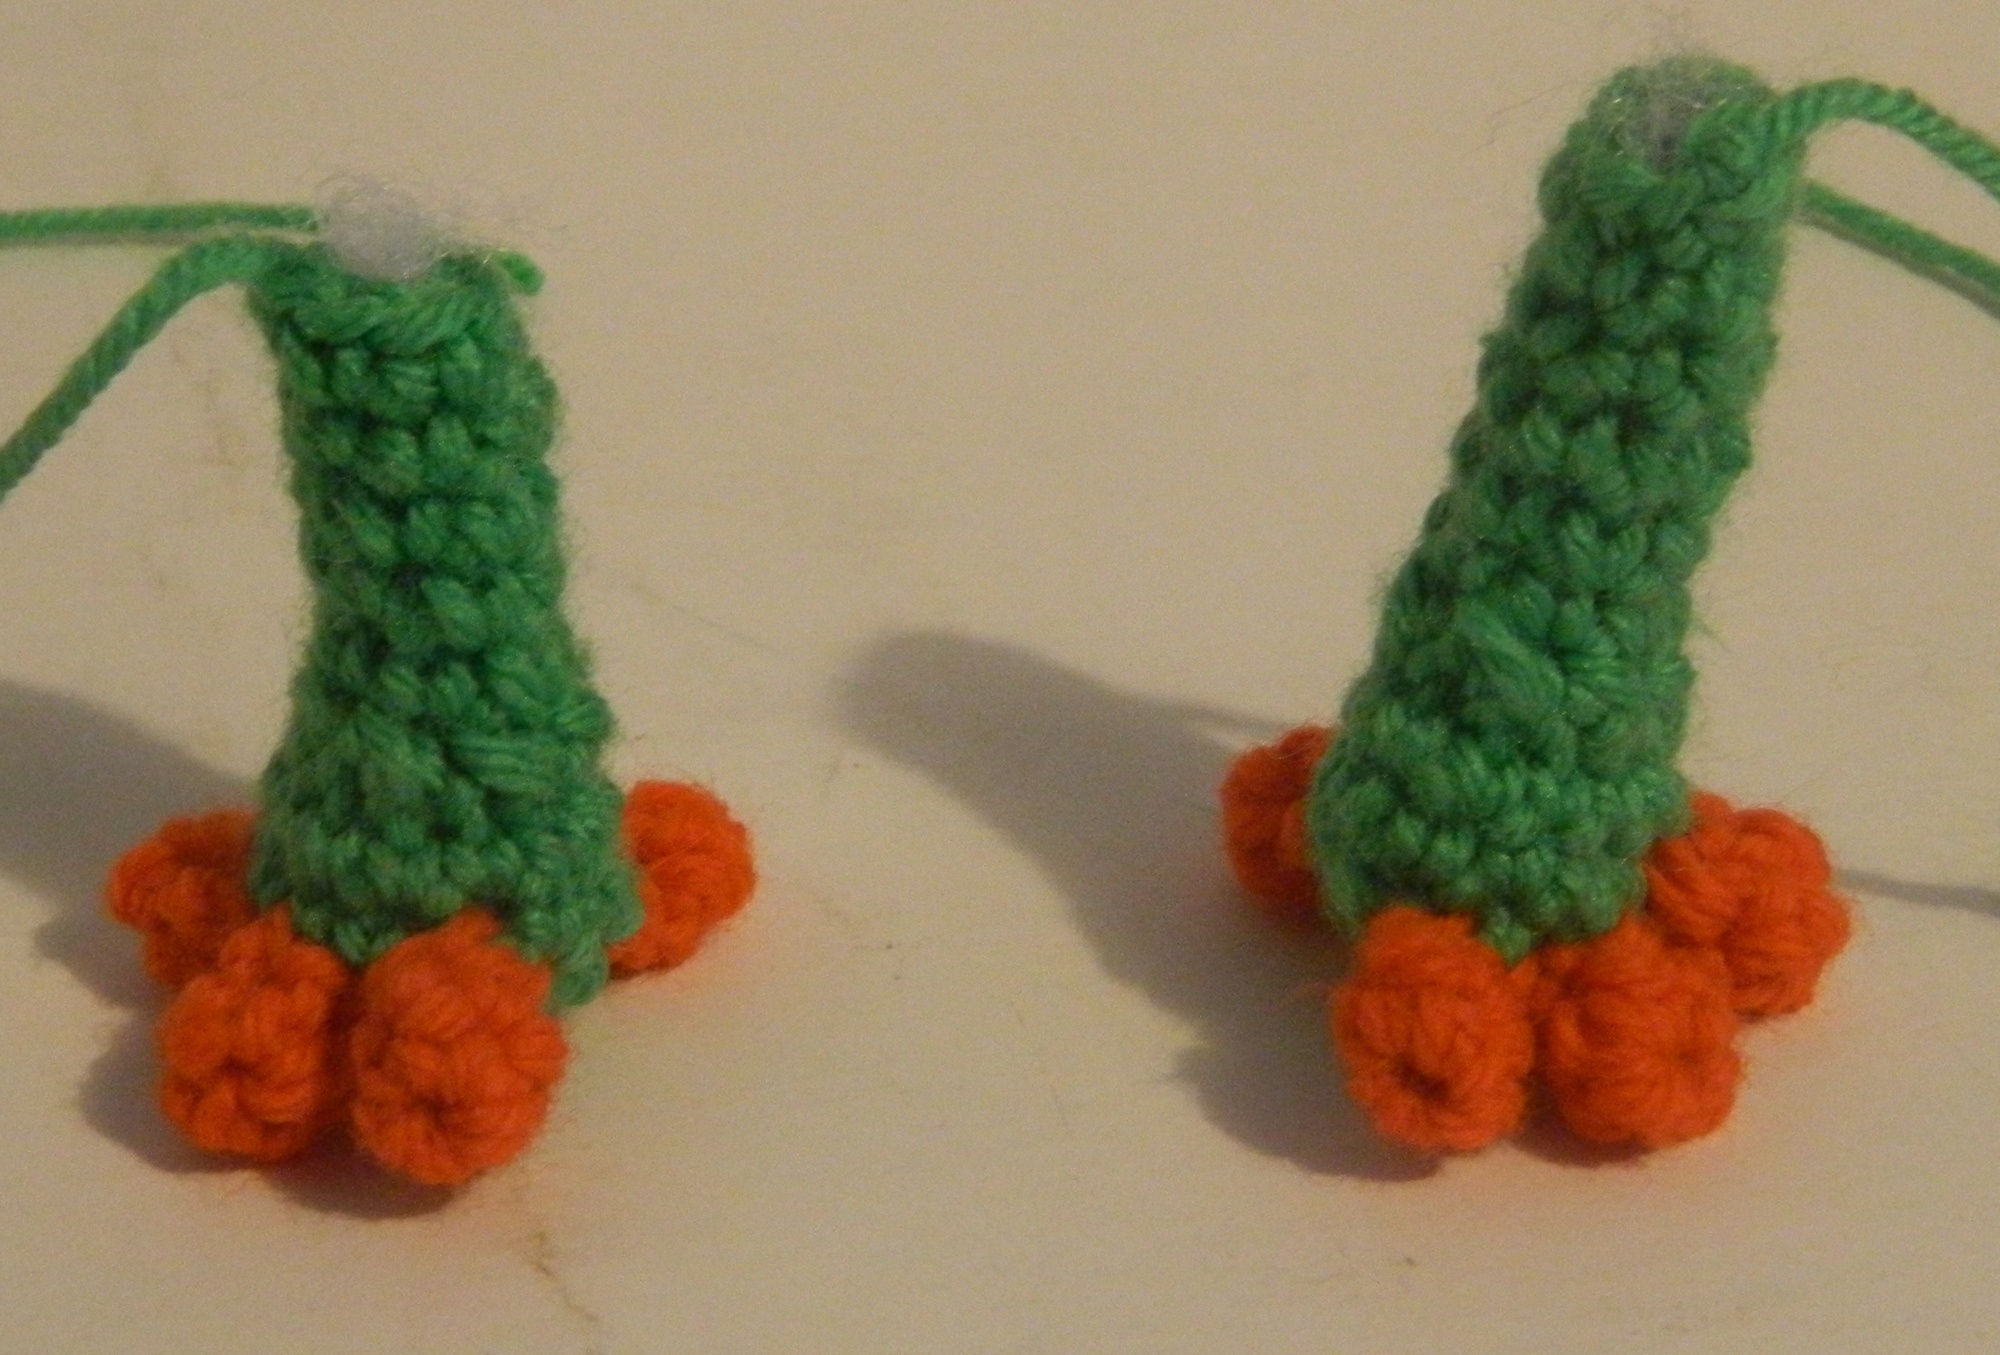
Legs
You will make two legs for the Yooka amigurumi using the green yarn.
Round 1: CH x 2 (2 stitches)
Round 2: SC x 6 in the first CH (6 stitches)
Round 3: INC x 6 (12 stitches)
Rounds 4-5: SC x 12 (12 stitches)
Round 6: DEC x 6 (6 stitches)
Rounds 7-11: SC x 6 (6 stitches)
SL
Fasten off leaving enough yarn to sew the legs to the body. Stuff the legs the desired amount.

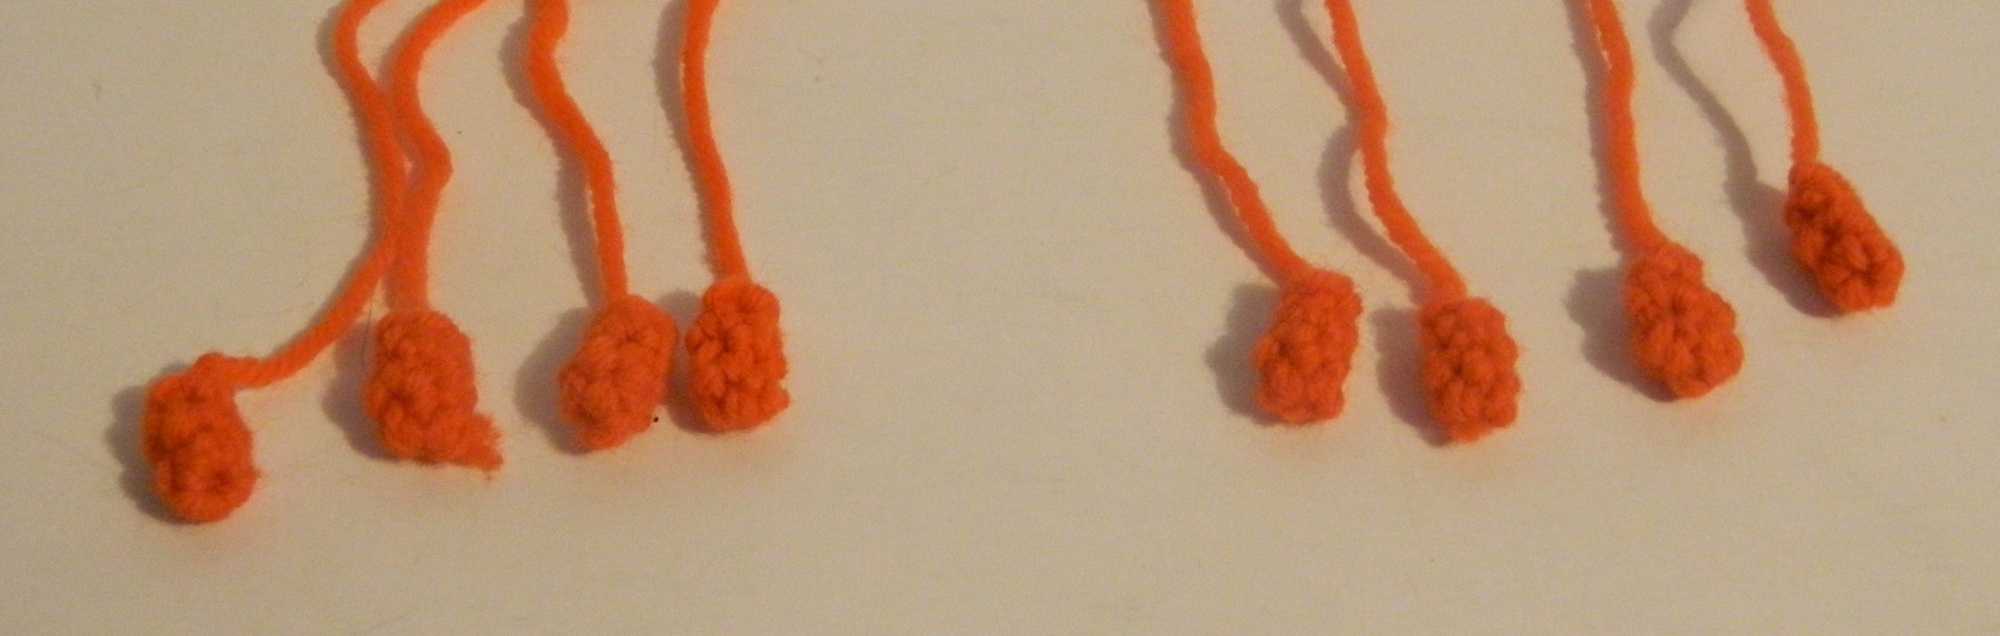
Toes
You will make four toes for each leg for a total of eight toes. The toes use the orange yarn.
Round 1: CH x 2 (2 stitches)
Round 2: SC x 4 in the first CH (4 stitches)
Round 3: SC x 4 (4 stitches)
SL
Fasten off leaving enough yarn to sew the toes to the legs.

Arms
You need to create two arms for the Yooka amigurumi. The arms start with the orange yarn and eventually switch to the green yarn.
Starting with the orange yarn.
Round 1: CH x 2 (2 stitches)
Round 2: SC x 6 in the first CH (6 stitches)
Round 3: INC x 6 (12 stitches)
Round 4: SC x 12 (12 stitches)
Switch to the green yarn.
Rounds 5-6: SC x 12 (12 stitches)
Round 7: DEC x 6 (6 stitches)
Rounds 8-13: SC x 6 (6 stitches)
SL
Fasten off leaving enough yarn to sew the arms to the body. Stuff the arms with the desired amount of stuffing.
Fingers
You will need to make four fingers for each arm for a total of eight fingers. The fingers use the orange yarn.
Round 1: CH x 2 (2 stitches)
Round 2: SC x 4 in the first CH (4 stitches)
Rounds 3-4: SC x 4 (4 stitches)
SL
Fasten off leaving enough yarn to sew the fingers to the arms.
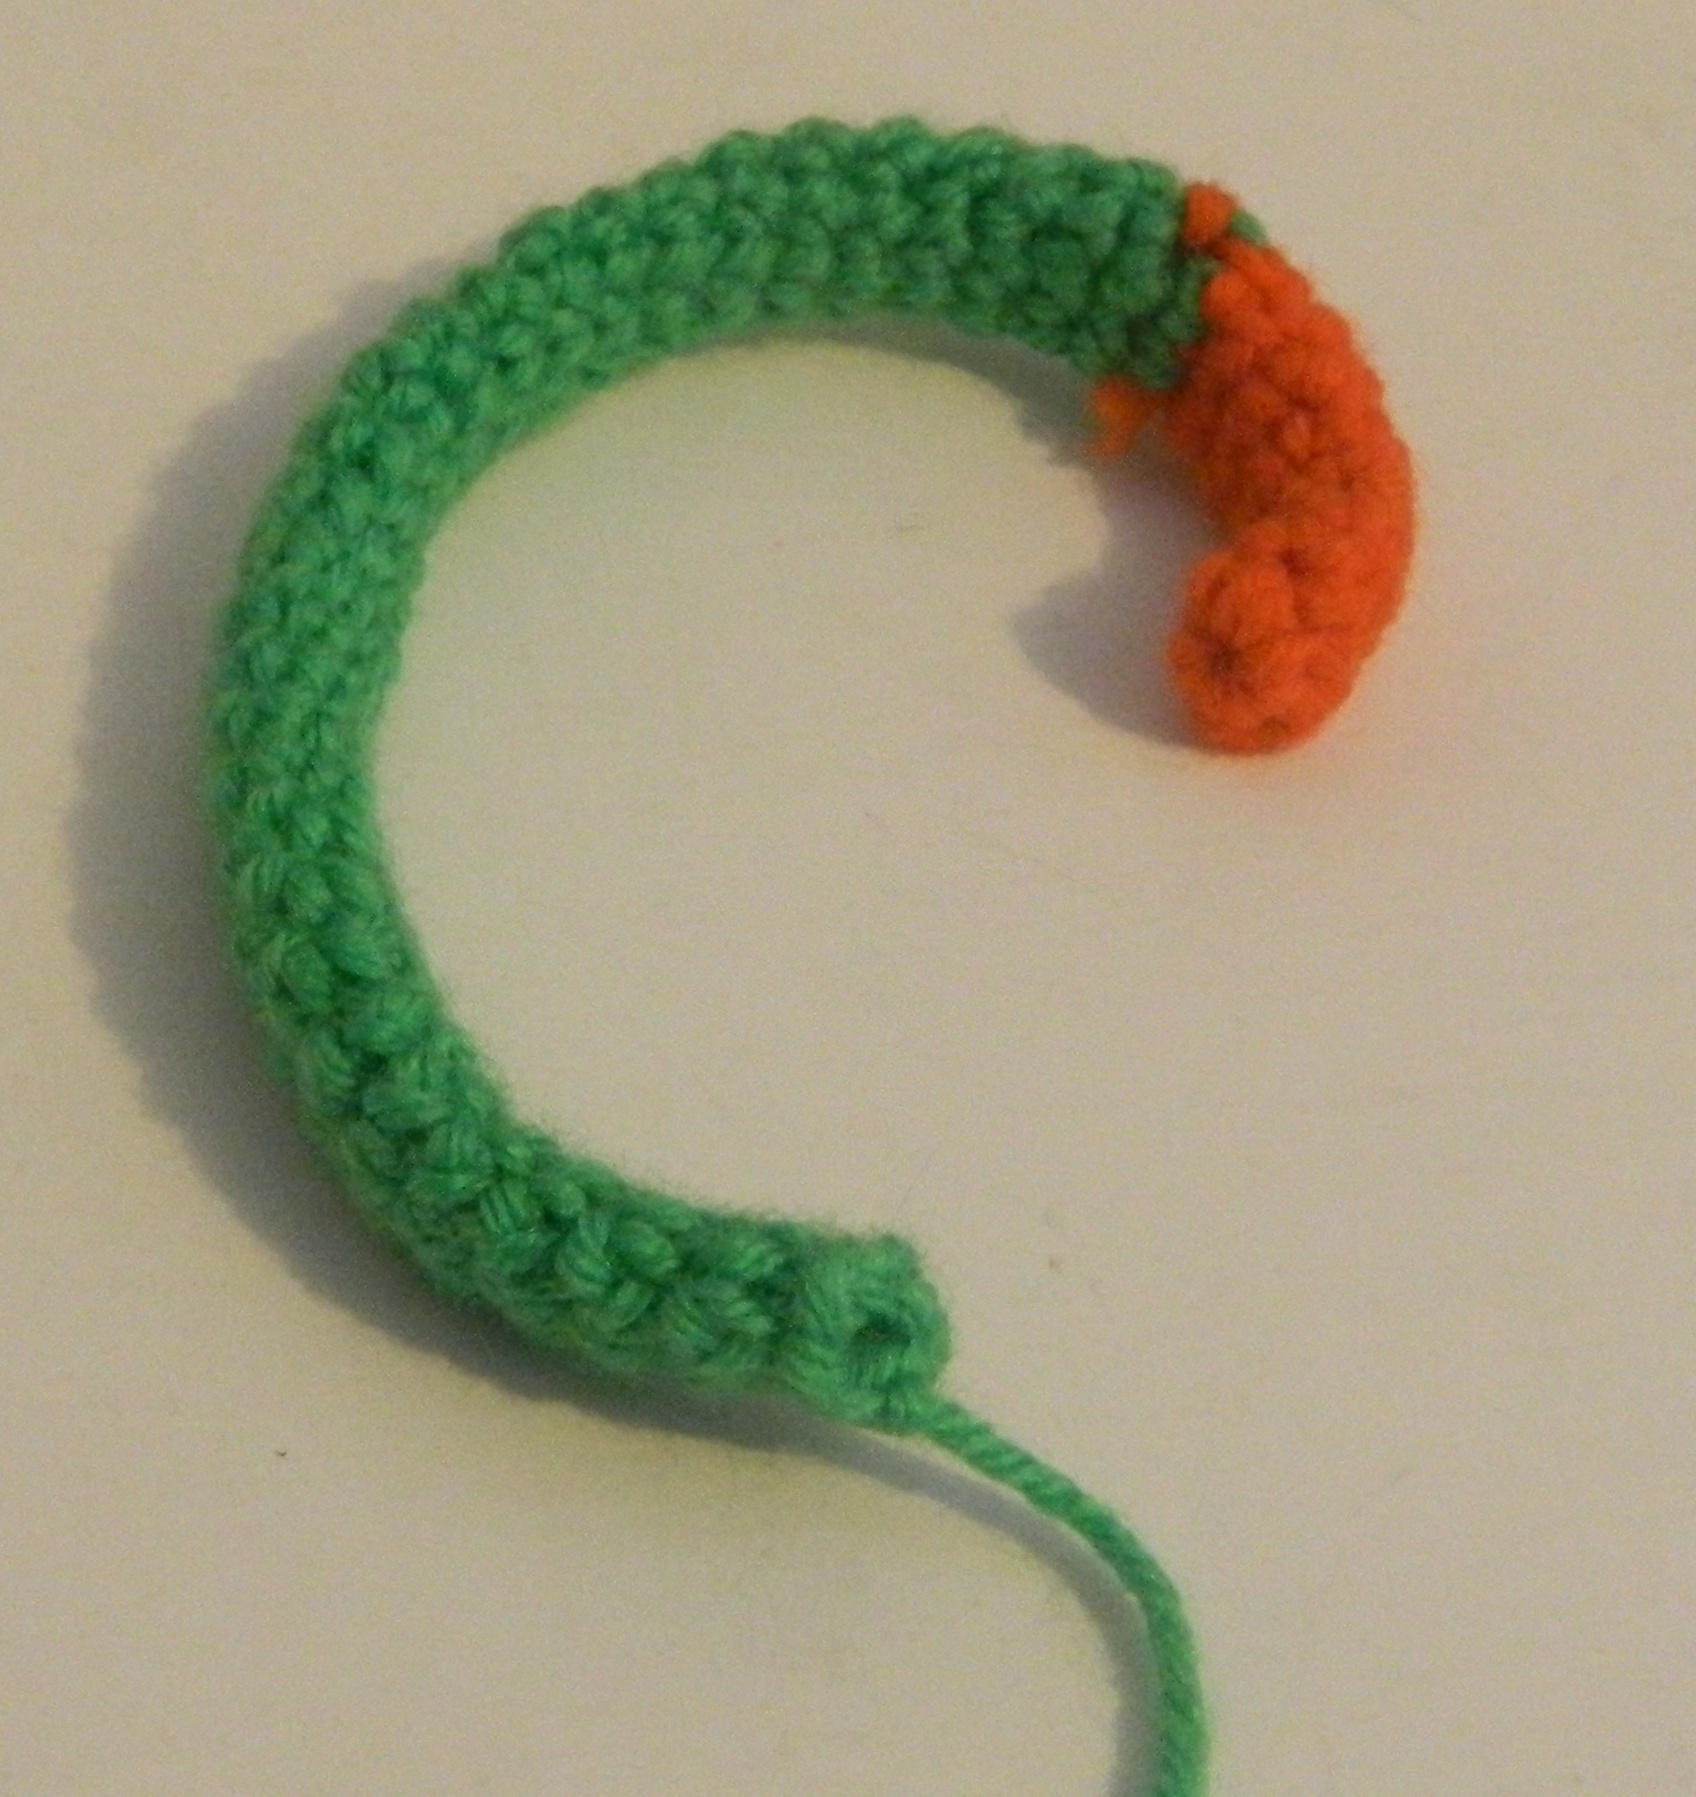
Tail
The tail uses both the orange and green yarn.
Start with the orange yarn.
Round 1: CH x 2 (2 stitches)
Round 2: SC x 6 in the first CH (6 stitches)
Round 3-9: SC x 6 (6 stitches)
Switch to the green yarn.
Rounds 10-39: SC x 6 (6 stitches)
SL
Fasten off leaving a enough yarn to sew the tail to the body as well as curl the tail. To keep the tail curled, roll up the end of the tail. Sew the extra green yarn back and forth through the rolled up part of the tail to keep it curled.
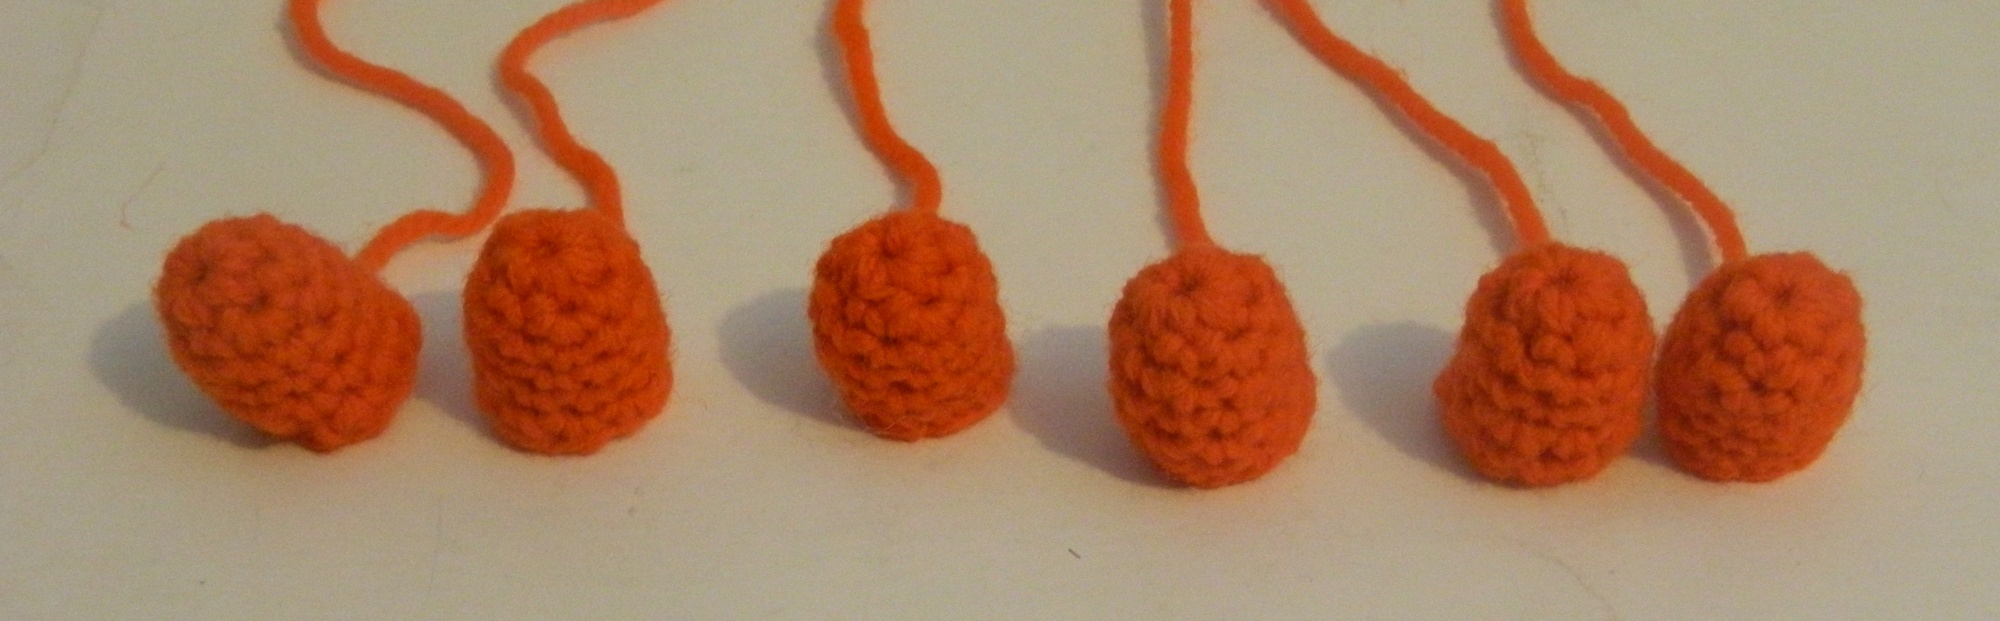
Head Bumps
To create the orange bumps on the back of the head you will create six head bumps. The head bumps use the orange yarn.
Round 1: CH x 2 (2 stitches)
Round 2: SC x 6 in the first CH (6 stitches)
Round 3: | SC, INC | x 6 (9 stitches)
Rounds 4-7: SC x 9 (9 stitches)
SL
Fasten off leaving enough yarn to sew the head bumps onto the back of the head. Fill the head bumps with the desired amount of stuffing.
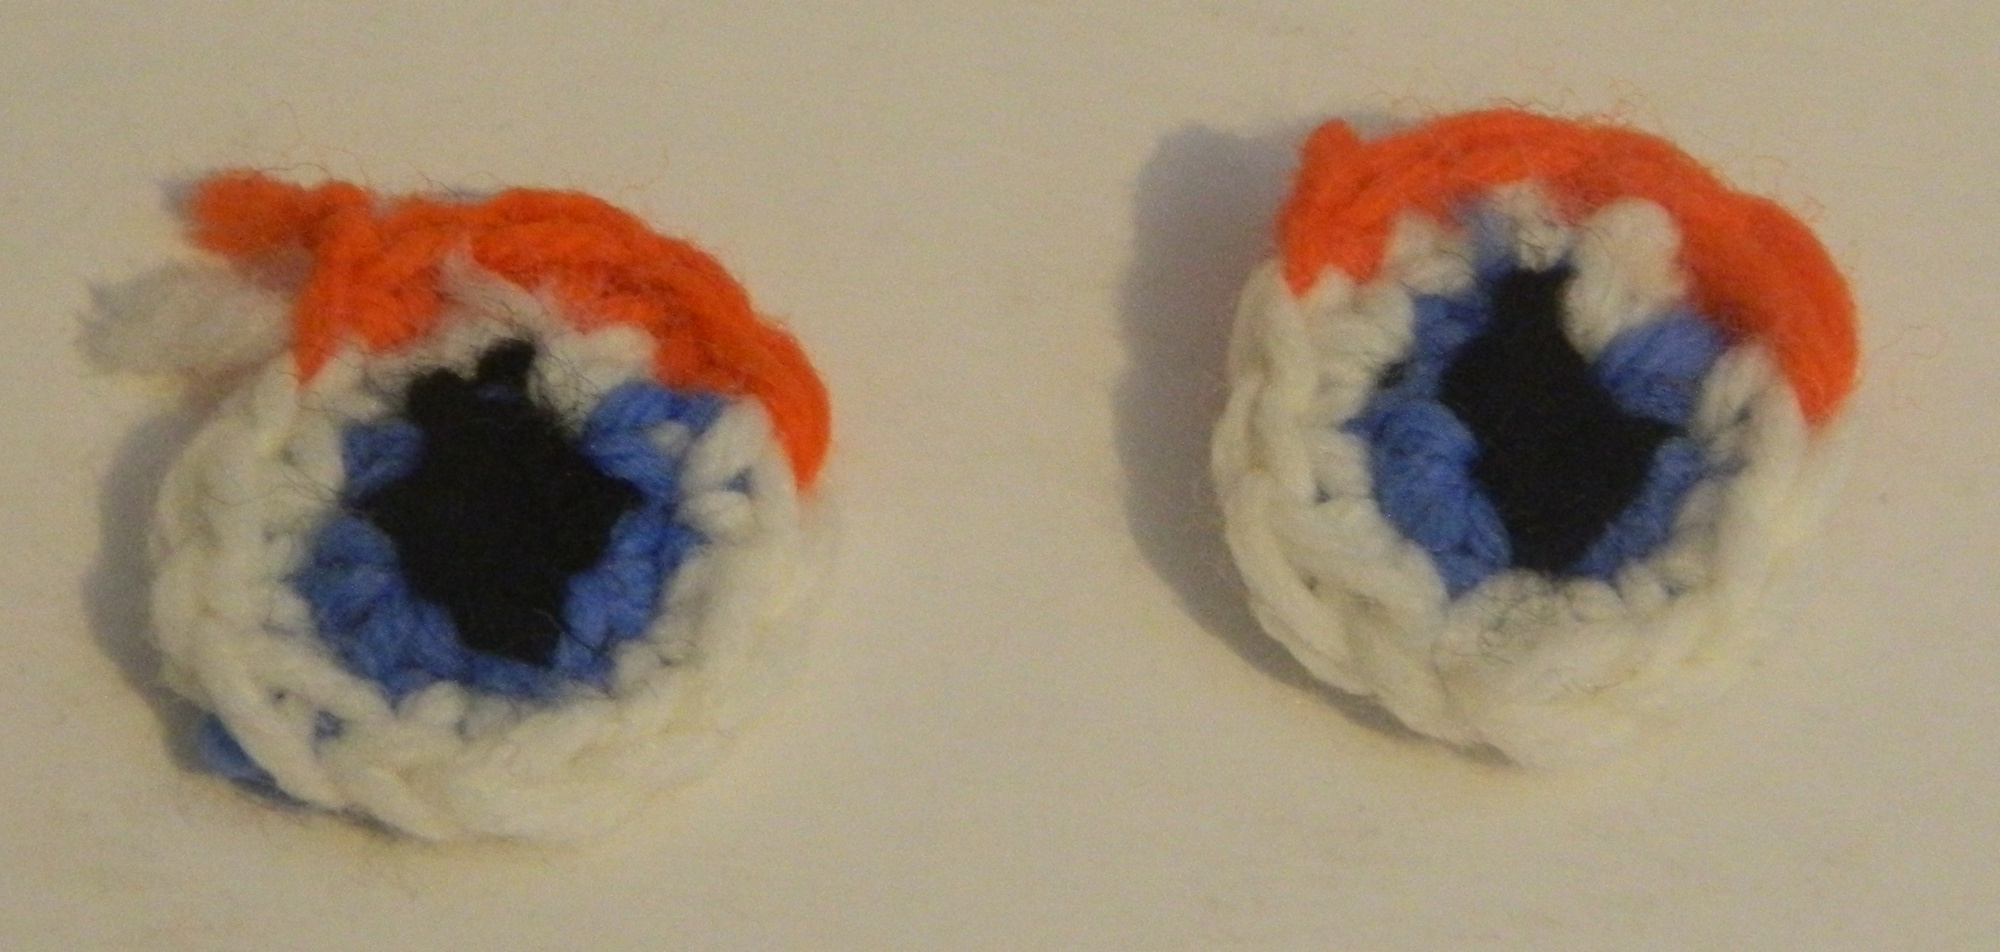
Eyes
For the eyes I used four different colors: black, blue, white and orange. If you want you could eliminate some of the colors to make the eyes less complicated.
Start with the black yarn.
Round 1: CH x 2 (2 stitches)
Round 2: SC x 3 in the first CH (3 stitches)
Switch to blue yarn.
Round 3: INC x 3 (6 stitches)
Switch to white yarn.
Round 4: INC x 6 (12 stitches)
Switch to orange yarn.
Round 5: SC x 5, SL (6 stitches)
Fasten off. To attach the eyes to the head I used some extra black yarn so you don’t have to leave extra yarn on the eyes to sew them to the body.
Assembly
The first step I took to assemble the Yooka amiguruni was to sew the head bumps to the back of the head. Three head bumps are sewn in a row on the left and right side of the head using the extra yarn on each head bump.

The next thing I did was complete the legs by sewing four toes to each leg. Three toes are sewn next to one another on one side while the fourth toe is sewn to the other side.
After both legs were completed I sewed them to the bottom of the body with the three toes pointing towards the front of the body.
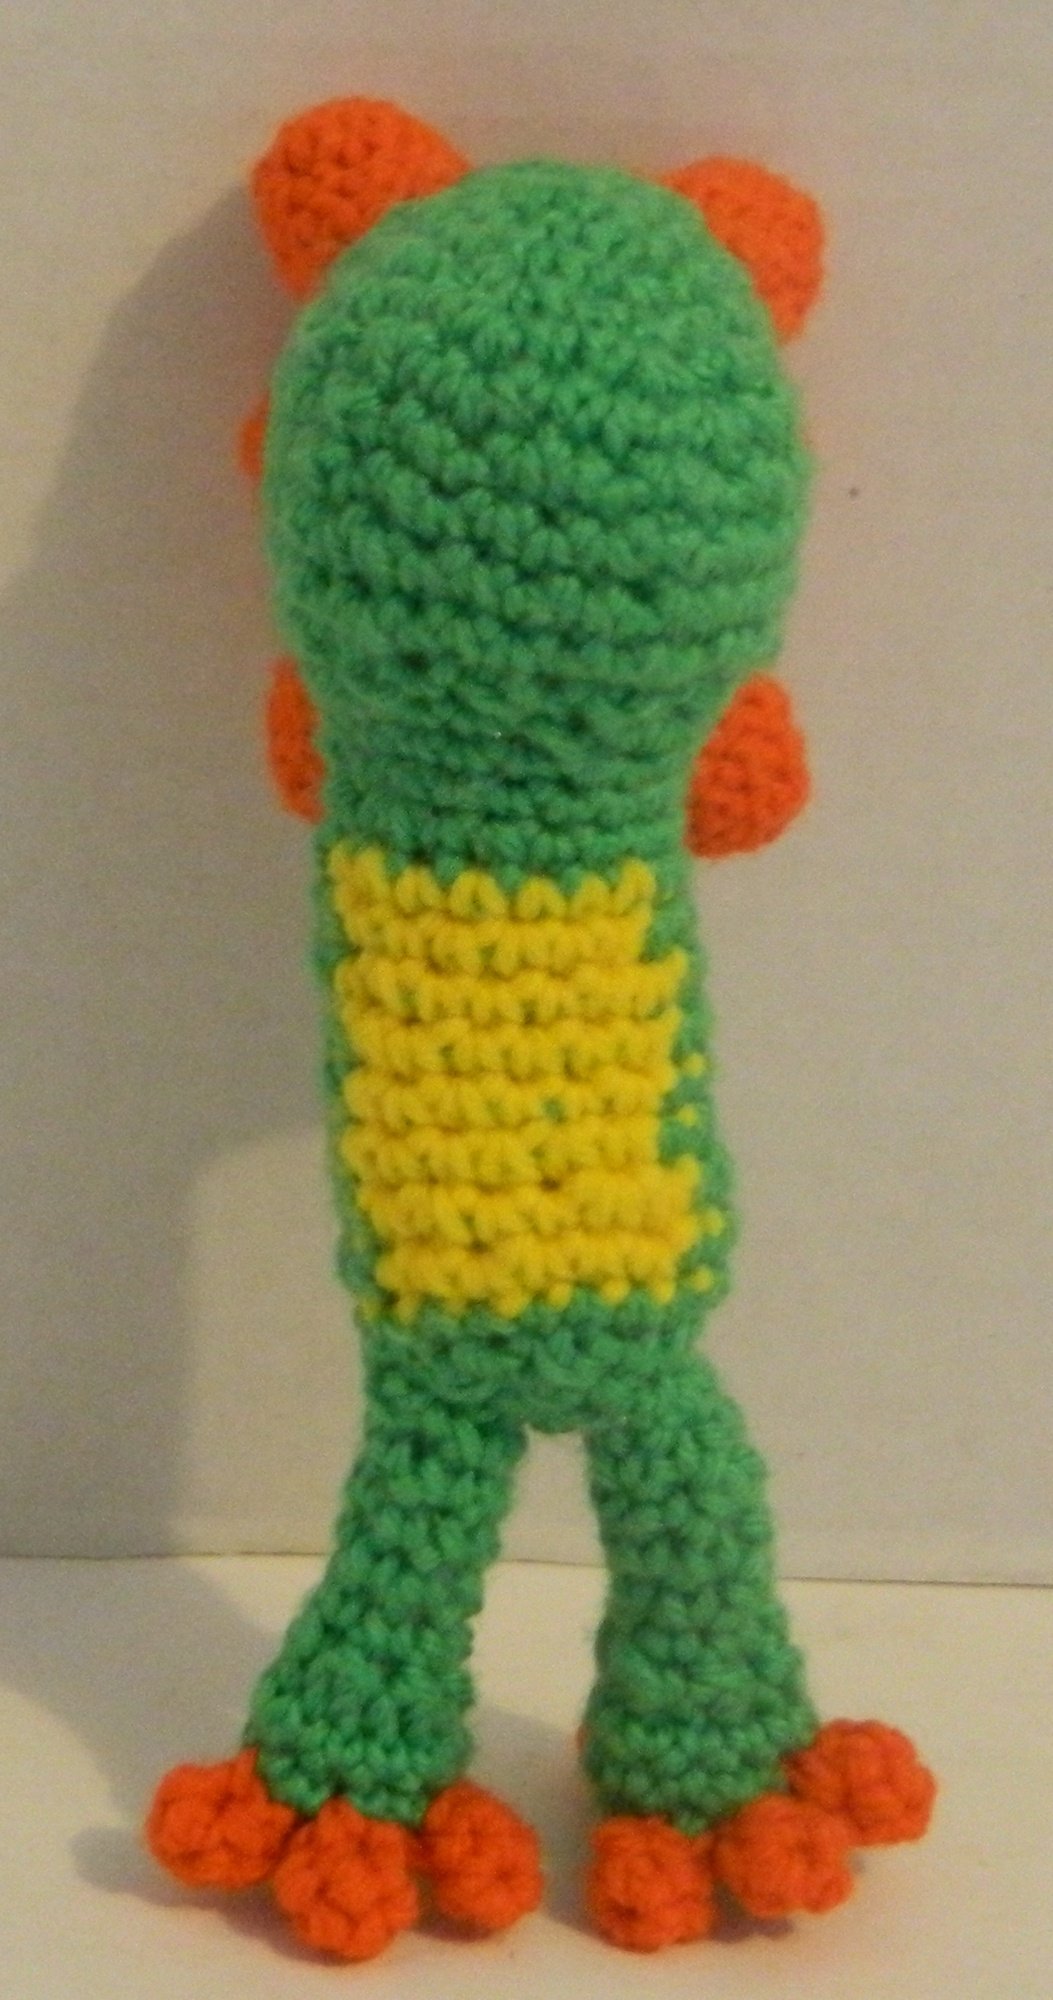
I then added the tail to the back of the body.

Next I assembled the arms by sewing four fingers to both hands. Three fingers I sewed next to each other with the fourth finger added to the side like a thumb.

After completing the hands I added them to the body. When adding the arms I had the “thumbs” pointed towards the front of the amigurumi.
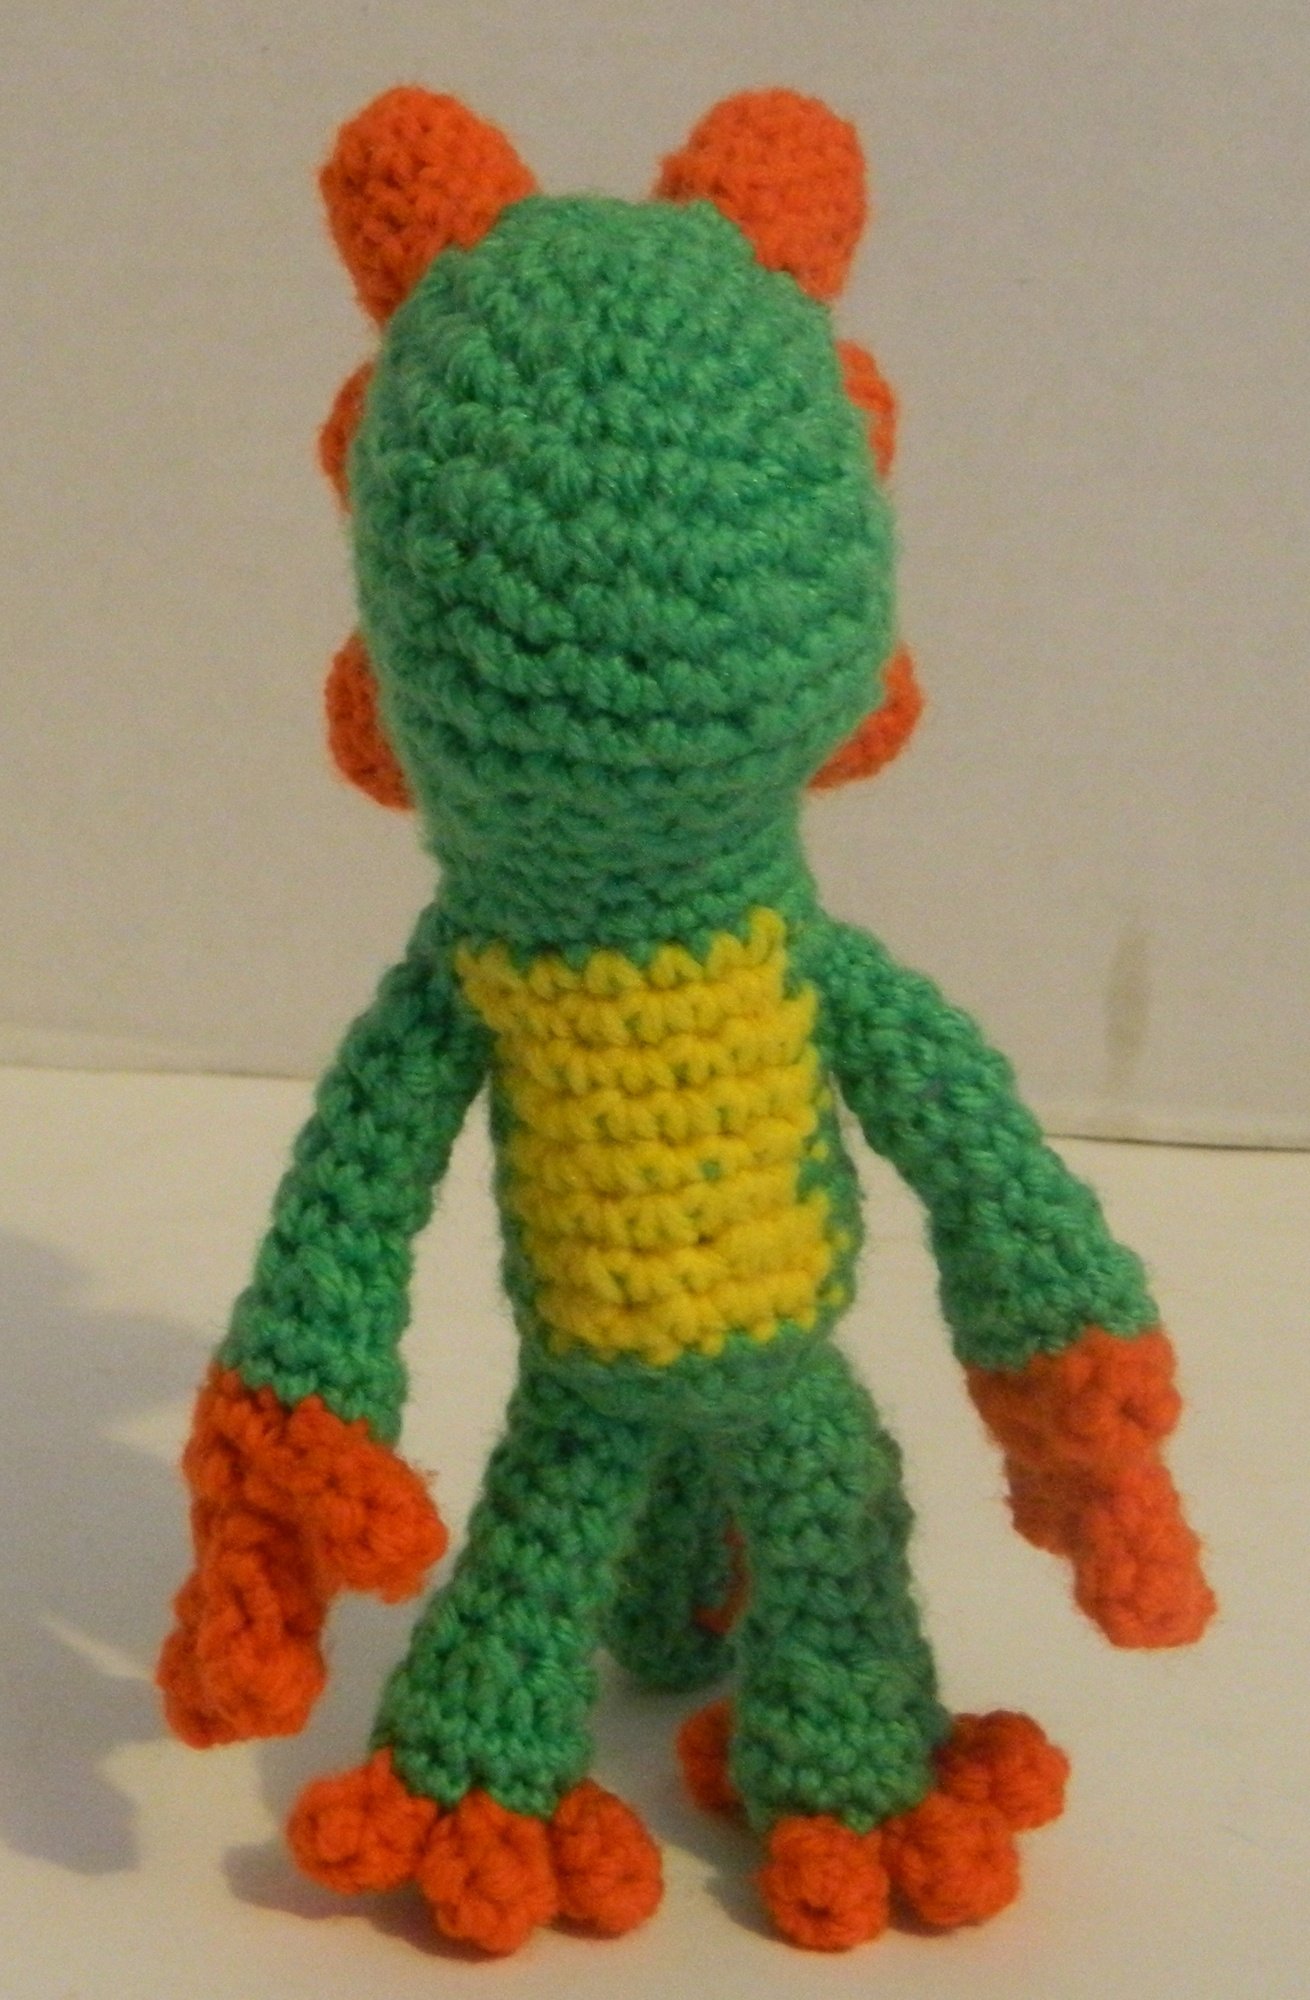
Finally I added the eyes to the amigurumi. Instead of using yarn from the eyes I used black yarn to give the eyes an outline.