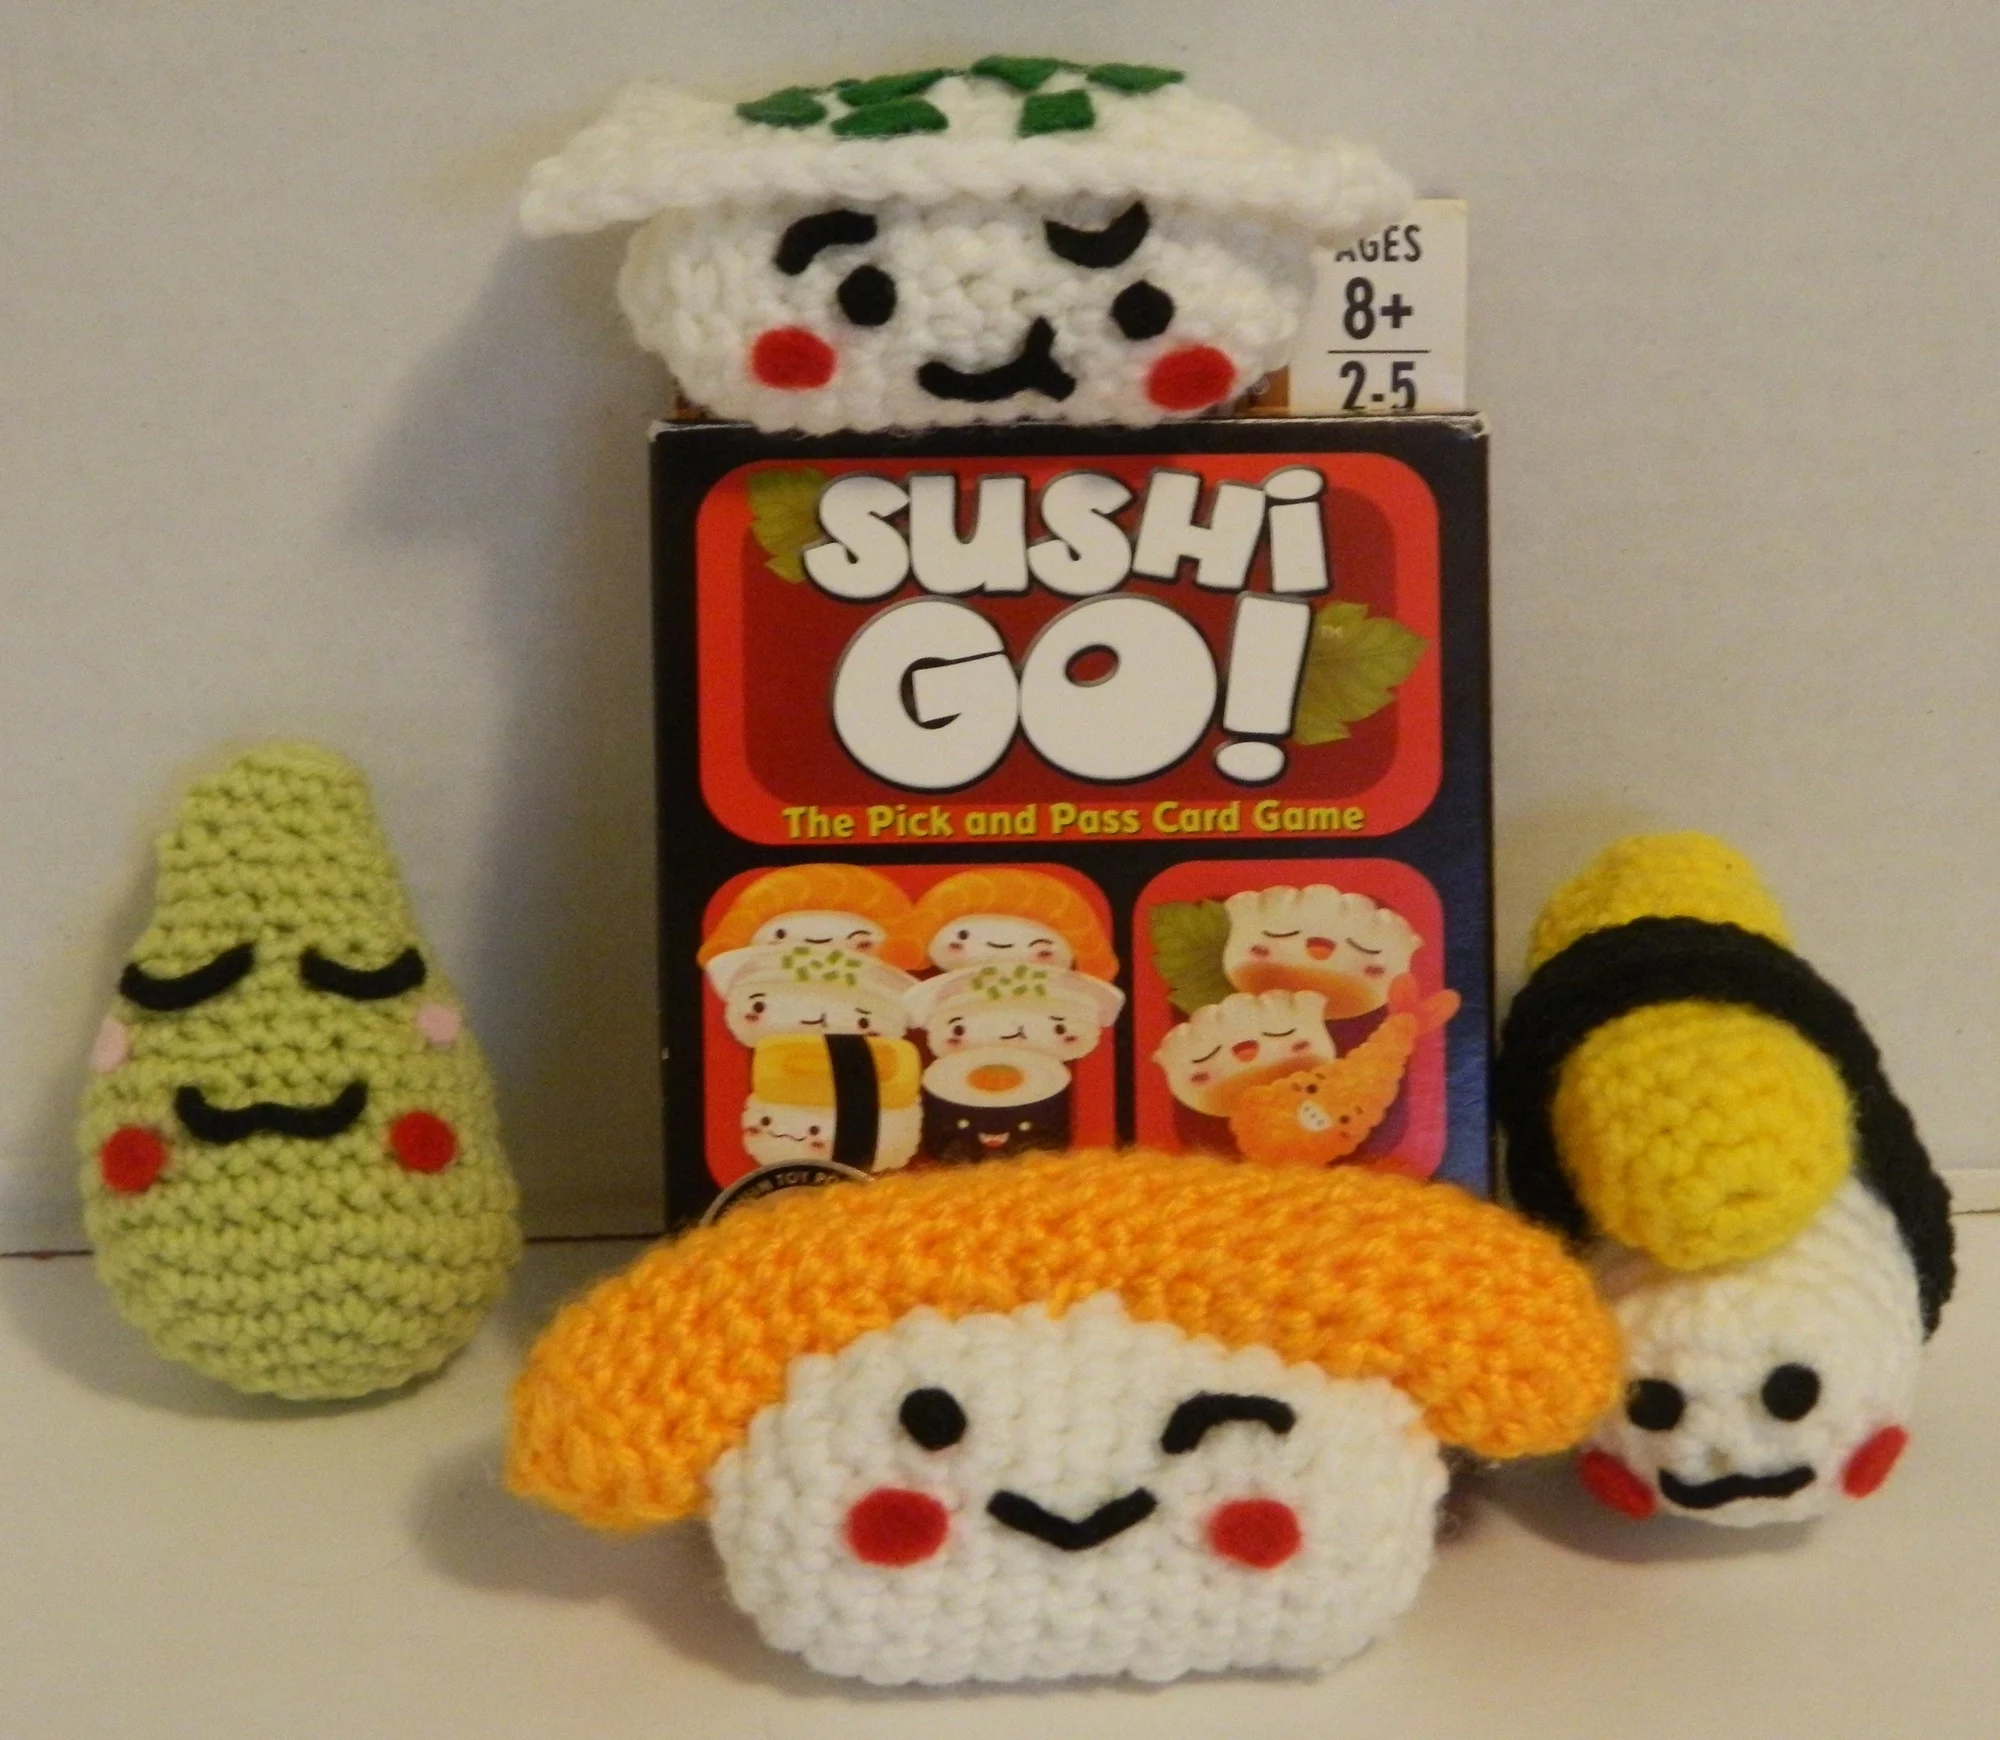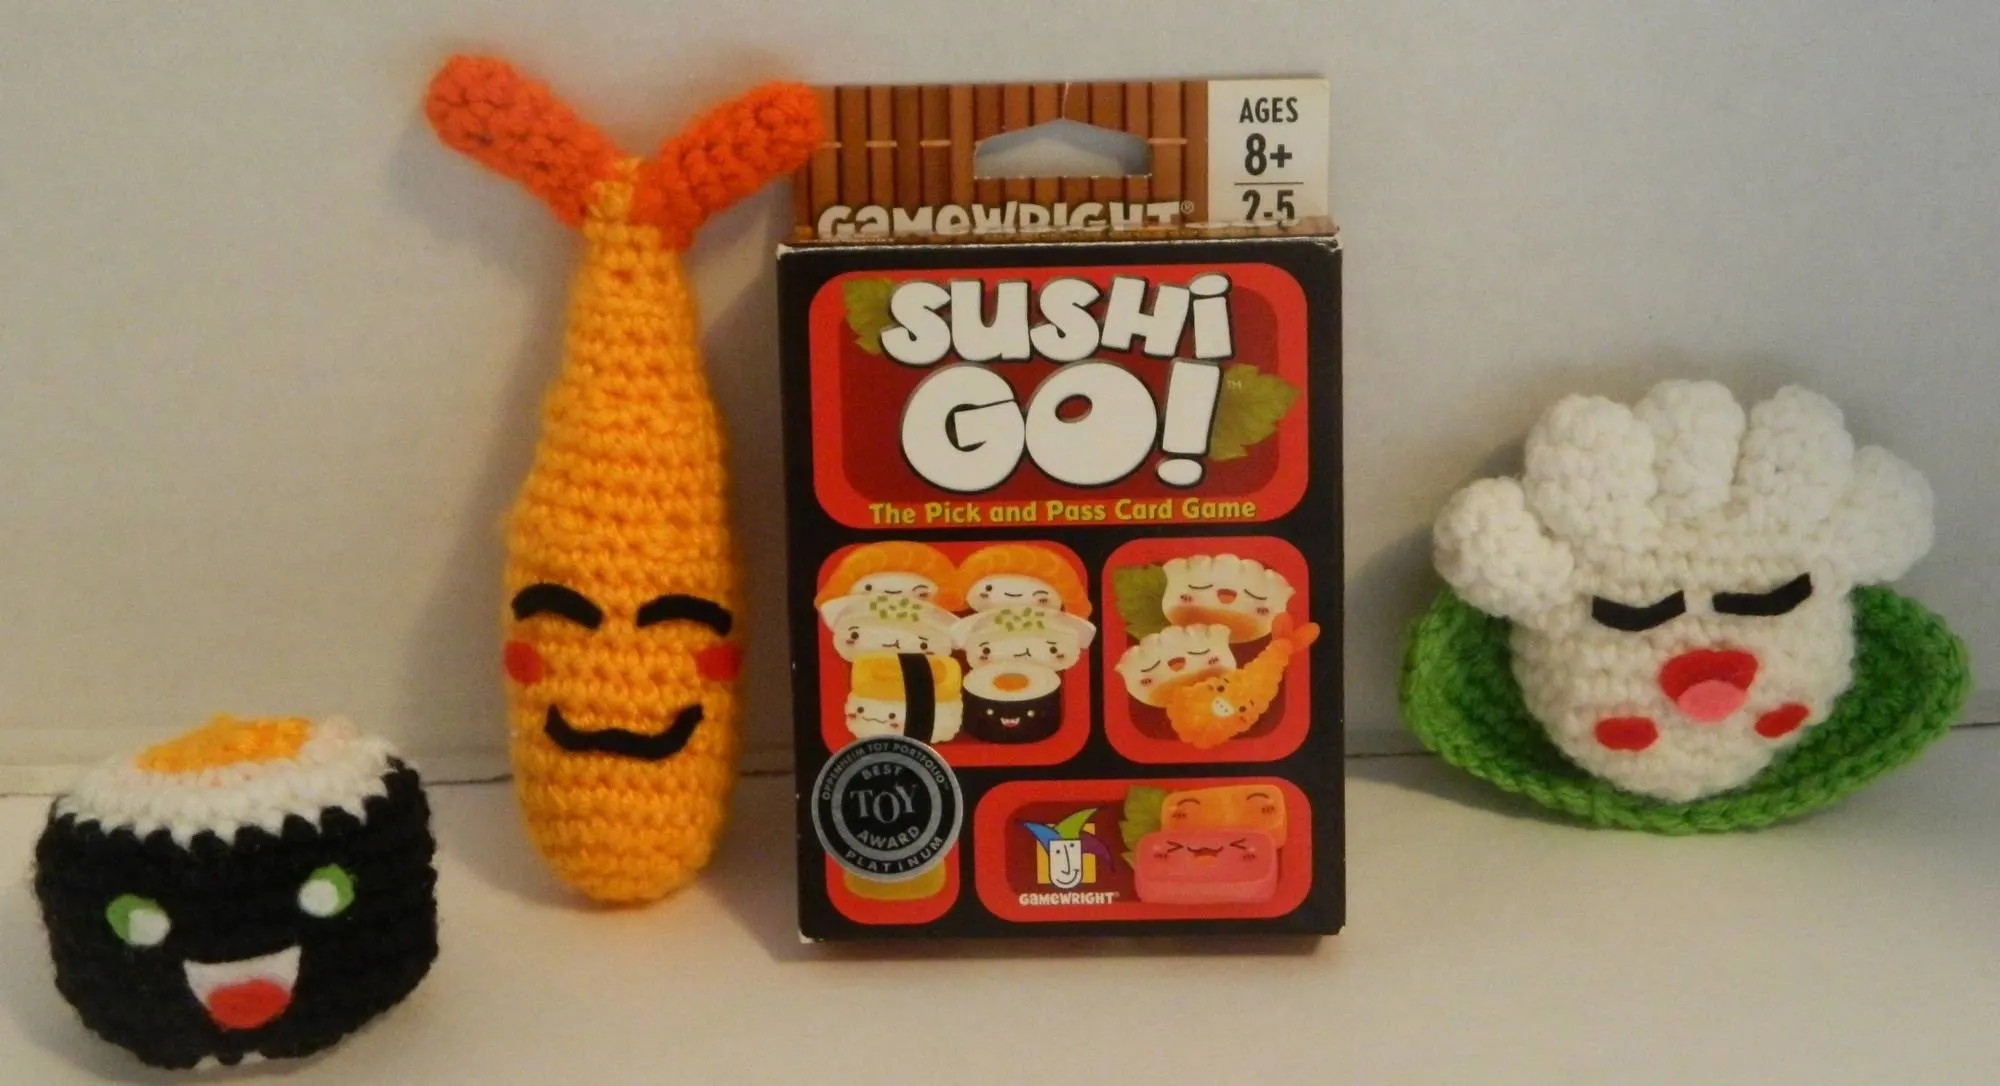
Released back in 2013 Sushi Go has become one of my favorite card games of all time (check out our review). What is so great about the game is the fact that the game is so easy to play and yet has a lot more strategy than you would expect. Other than the gameplay, another thing that stands out about the game is the great art design. The game does such a great job creating cute characters out of food items. Because I love the game so much I decided to make amigurumis of the different characters from the game. With how many characters are included in the game, this will be broken down into three parts which will be released over the next couple weeks. Check out part two where I have patterns for the Wasabi, Egg Nigiri, Salmon Nigiri, and Squid Nigiri. In part three I include patterns for the Chopsticks, Pudding and Sashimi.
These patterns create a Maki Roll, Tempura, and Dumpling amigurumis. The Maki Roll is around two inches tall and approximately two and a half inches wide. The Tempura is approximately six inches tall. The Dumpling is approximately three and a half inches tall and four and a half inches wide.
Note: This pattern is provided for free so I would appreciate that it not be used for commercial use. You may not copy this pattern and then try to sell it. I would appreciate that this pattern not be copied and posted in its’ entirety on other websites. Feel free to post images of your completed works wherever you want but a link back to this page would be appreciated.
What Do You Need to Know
Difficulty: Light
In order to follow the Maki Roll, Tempura and Dumpling patterns you will need to know how to do the following:
- Slipknot | Tutorial
- Chain Stitch (CH) | Tutorial
- Single Crochet (SC) | Tutorial
- Increase (INC) | Tutorial
- Decrease (DEC) | Tutorial
- Slip Stitch (SL) | Tutorial
- Fastening Off | Tutorial
- Changing Colors (only for the Maki Roll) | Tutorial
What You Need
- Black Yarn (Maki Roll) Buy on Amazon
- White Yarn (Maki Roll, Dumpling) Buy on Amazon
- Orange Yarn (Maki Roll, Tempura) Buy on Amazon
- Dark Orange Yarn (Tempura) Buy on Amazon
- Green Yarn (Dumpling) Buy on Amazon
- Black Felt (Tempura, Dumpling) Buy on Amazon
- White Felt (Maki Roll) Buy on Amazon
- Red Felt (Maki Roll, Tempura, Dumpling) Buy on Amazon
- Pink Felt (Dumpling) Buy on Amazon
- Green Felt (Maki Roll) Buy on Amazon
- Stuffing Buy on Amazon
- E/4 3.50 MM Crochet Hook Buy on Amazon
- Yarn needle Buy on Amazon
- Stitch markers Buy on Amazon
- Felt Glue Buy on Amazon
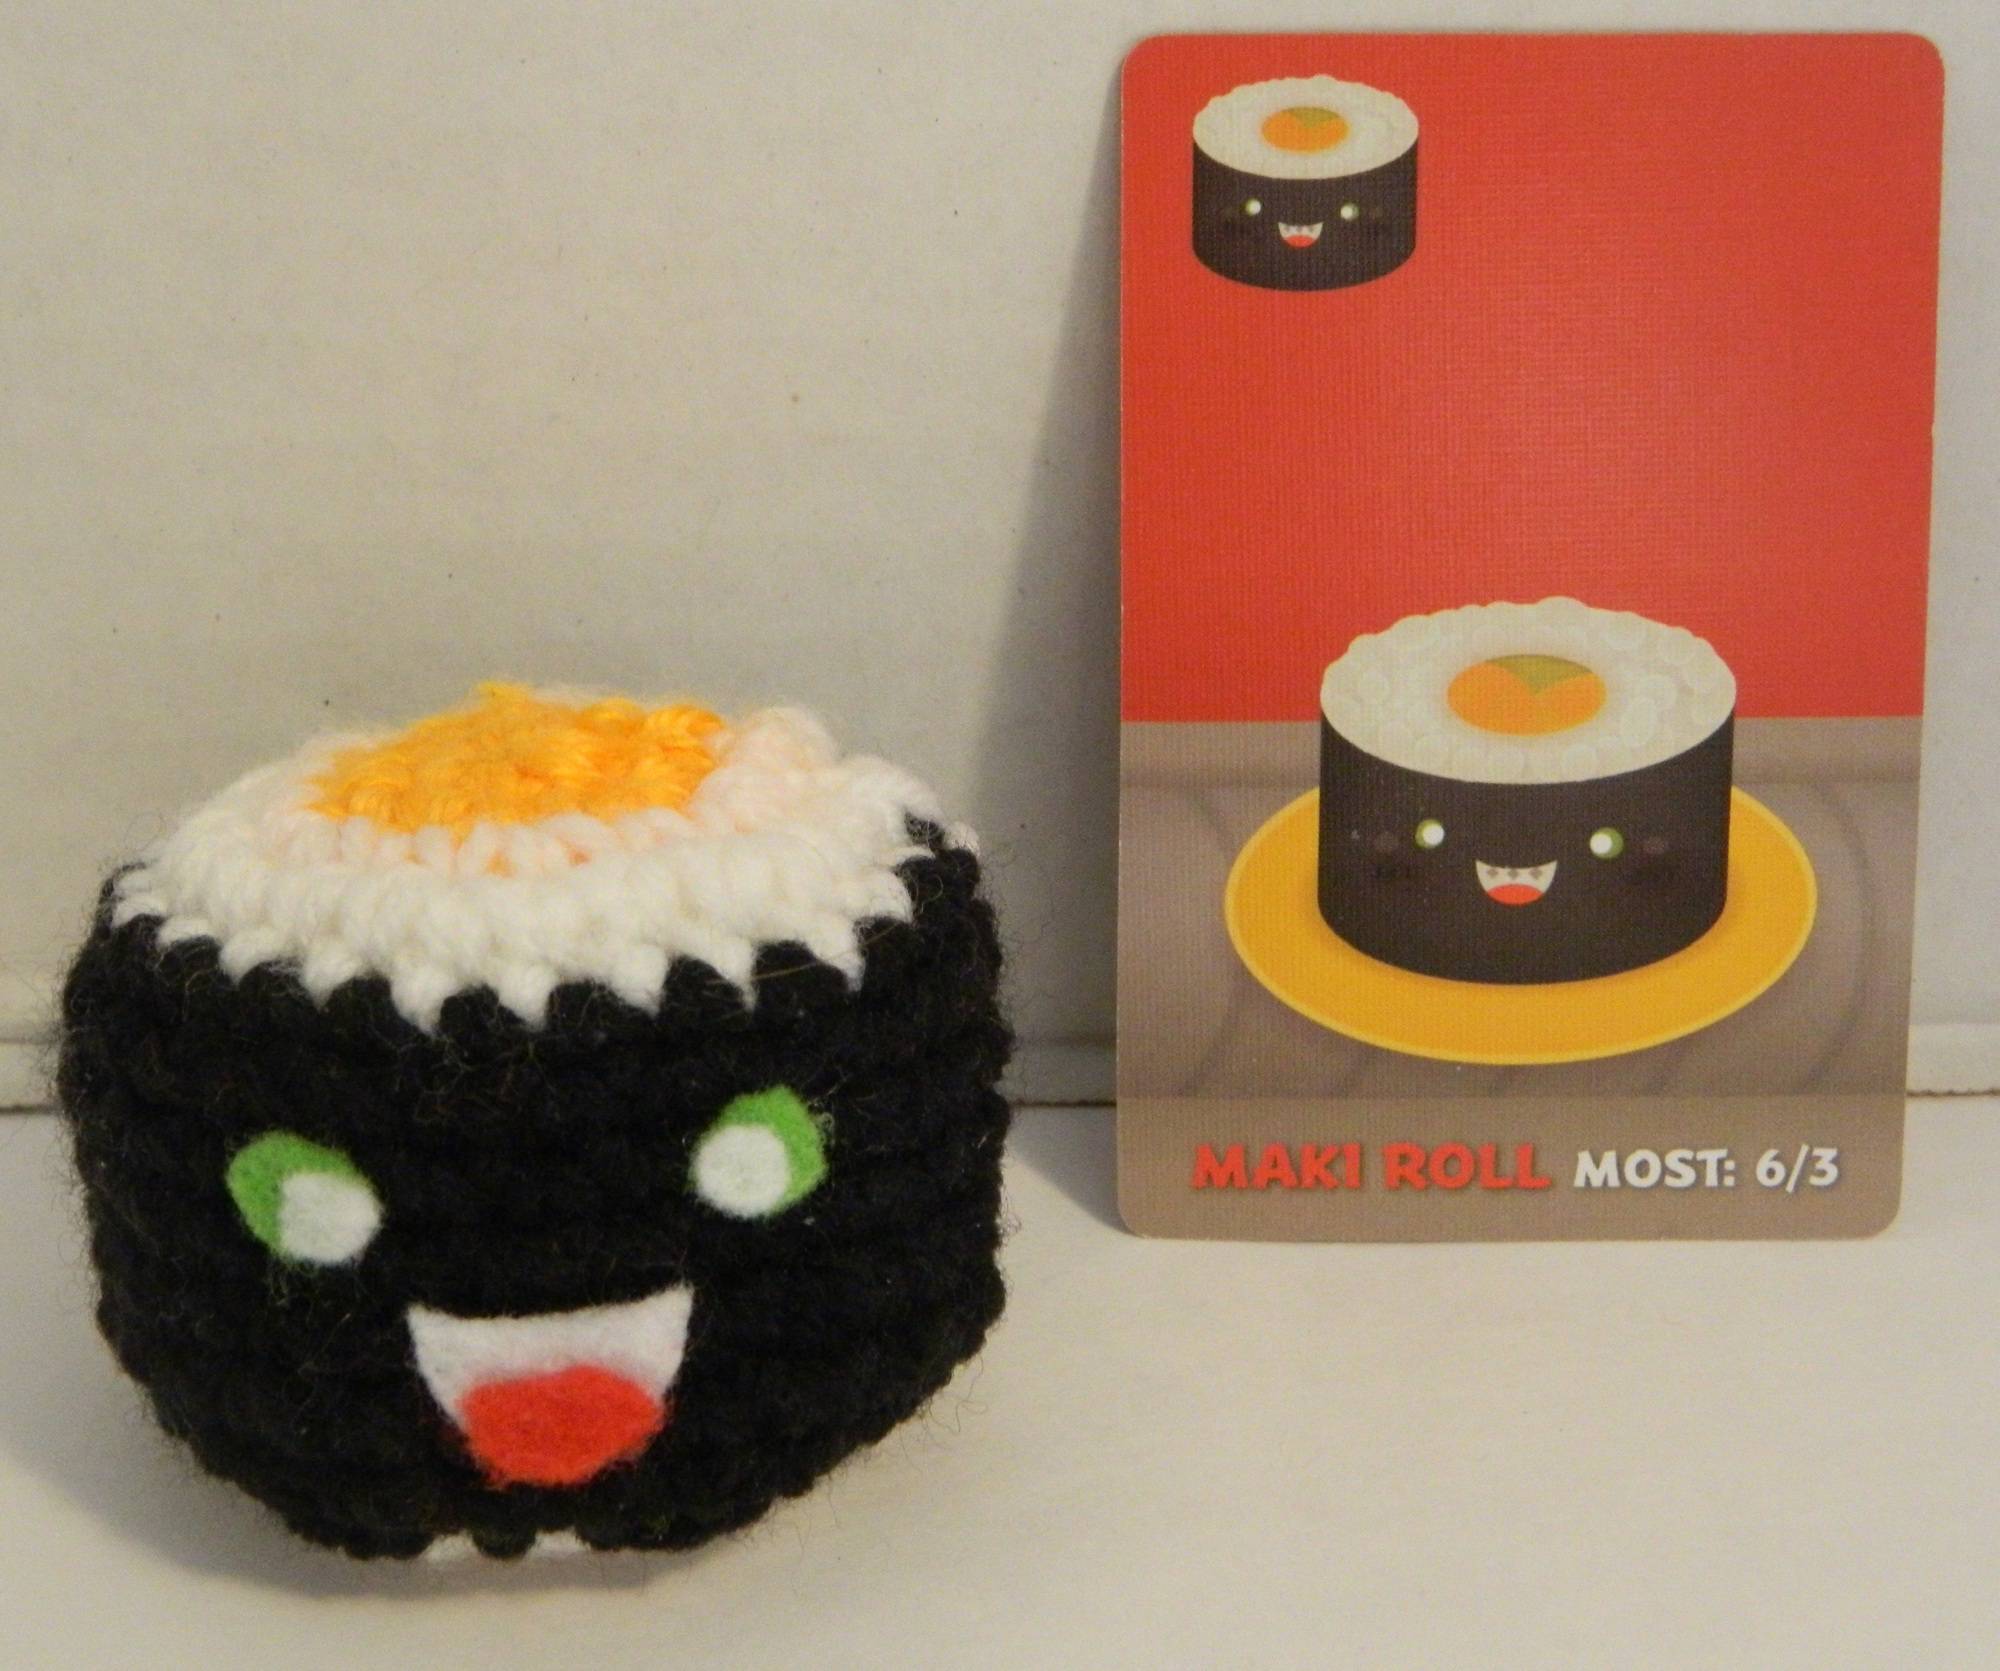
Maki Roll
For the Maki Roll you will be using orange, white, and black yarn. You will start with the orange yarn.
Round 1: CH x 2 (2 stitches)
Round 2: SC x 6 in the first CH (6 stitches)
Round 3: INC x 6 (12 stitches)
Switch to the white yarn.
Round 4: | SC, INC | x 6 (18 stitches)
Round 5: | SC, INC, SC | x 6 (24 stitches)
Switch to the black yarn.
Rounds 6-12: SC x 24 (24 stitches)
Switch to the white yarn.
Round 13: | SC, DEC, SC | x 6 (18 stitches)
Round 14: | SC, DEC | x 6 (12 stitches)
Switch to the orange yarn.
Round 15: DEC x 6 (6 stitches)
Round 16: SL (1 stitch)
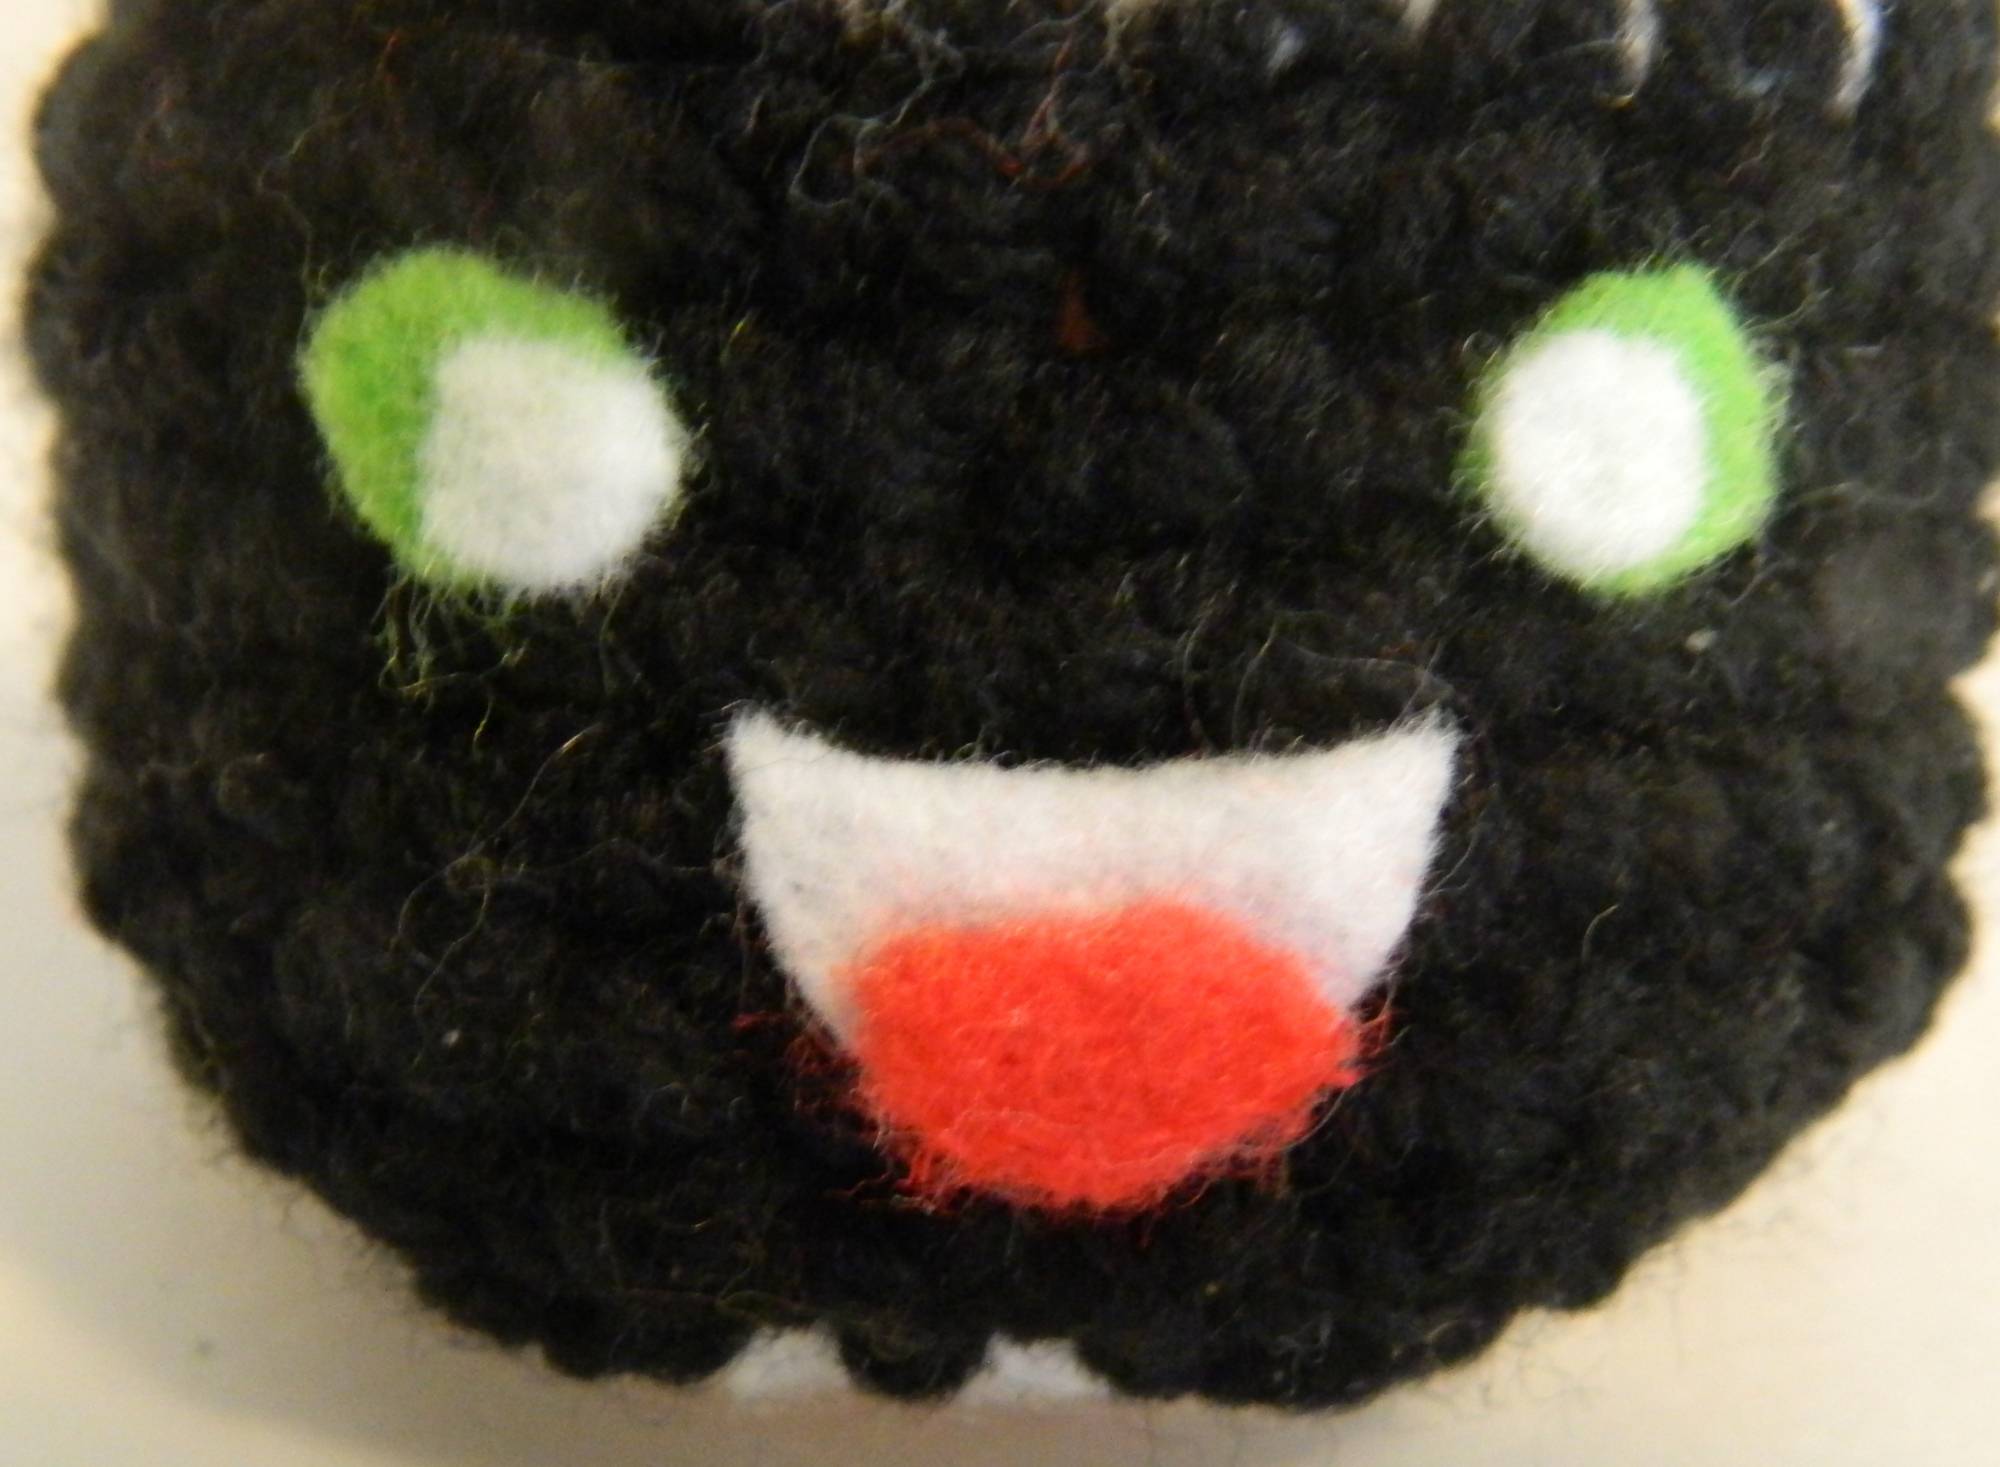
Fasten off, add the desired amount of stuffing, and sew up the hole. Use the green, white, and red felt to create the different facial features. Use the felt glue to add the felt pieces to the body.

Tempura
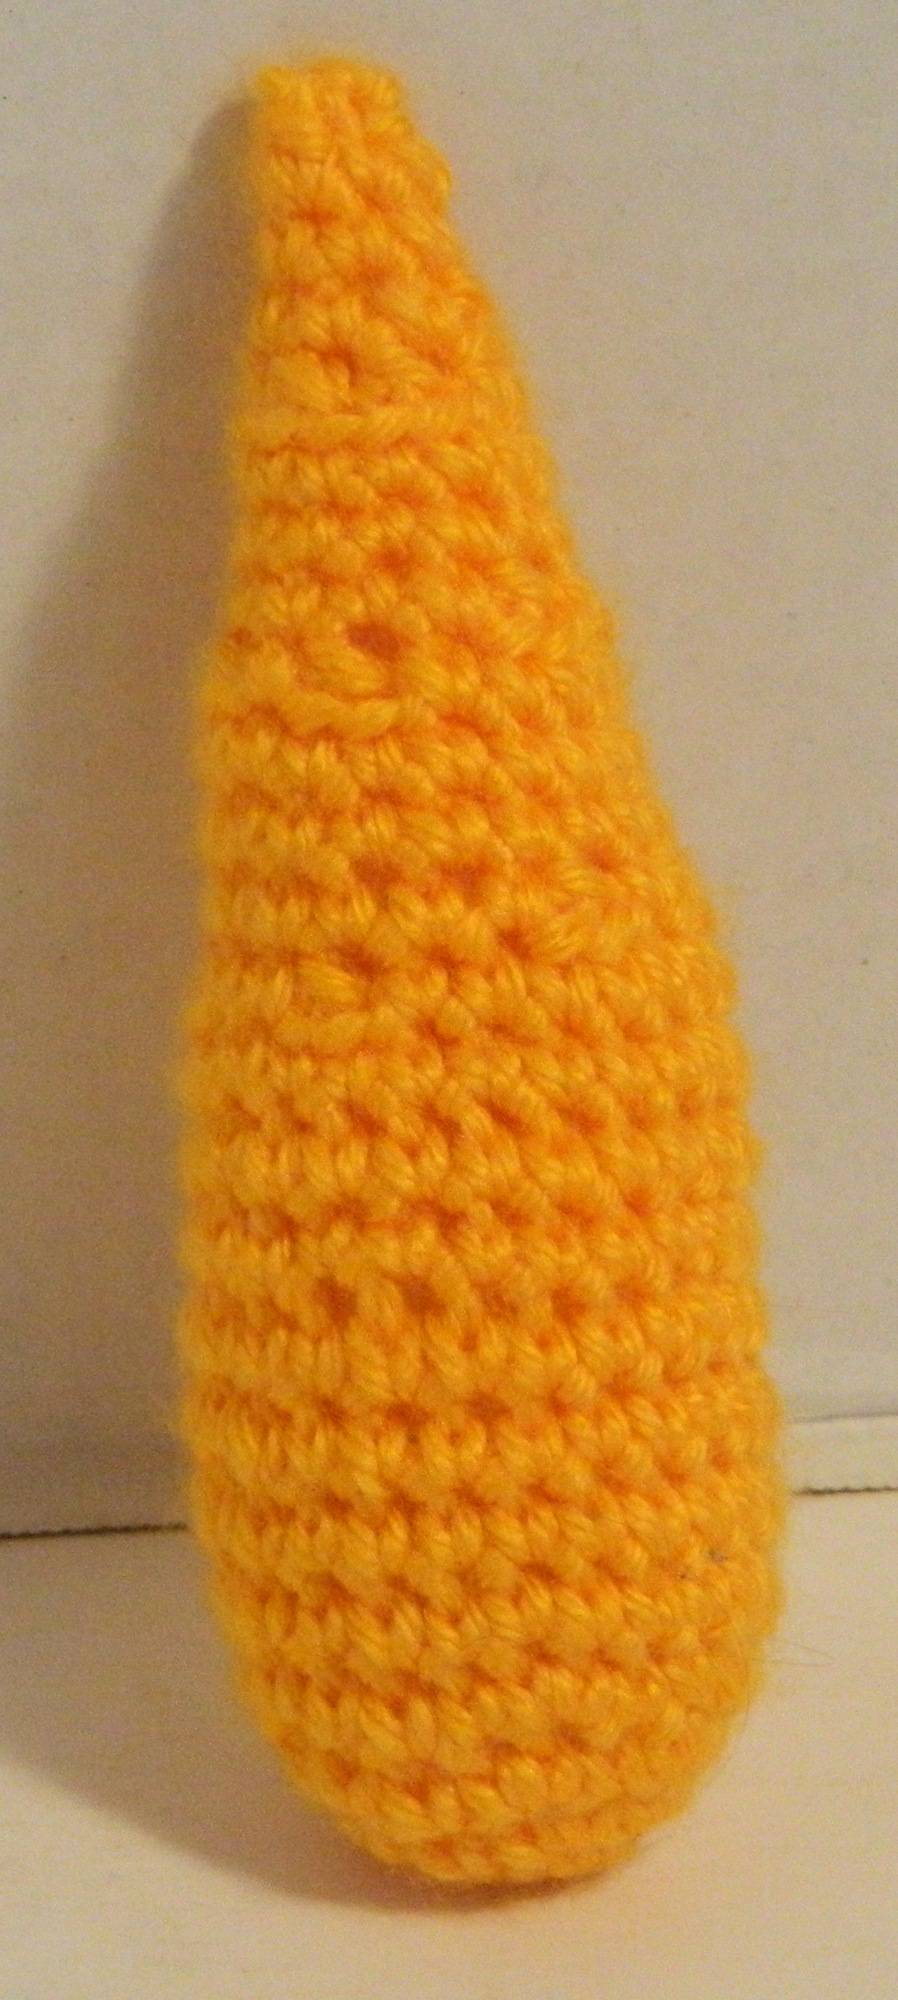
Body
For the body you will be using the lighter orange yarn.
Round 1: CH x 2 (2 stitches)
Round 2: SC x 6 in the first CH (6 stitches)
Round 3: INC x 6 (12 stitches)
Round 4: | SC, INC | x 6 (18 stitches)
Round 5: | SC, INC, SC | x 6 (24 stitches)
Rounds 6-13: SC x 24 (24 stitches)
Round 14: | SC, DEC, SC | (18 stitches)
Rounds 15-17: SC x 18 (18 stitches)
Round 18: | SC, DEC | x 6 (12 stitches)
Rounds 19-21: SC x 12 (12 stitches)
Round 22: DEC x 6 (6 stitches)
Rounds 23-25: SC x 6 (6 stitches)
Round 26: SL (1 stitch)
Fasten off, add the desired amount of stuffing, and sew up the hole.
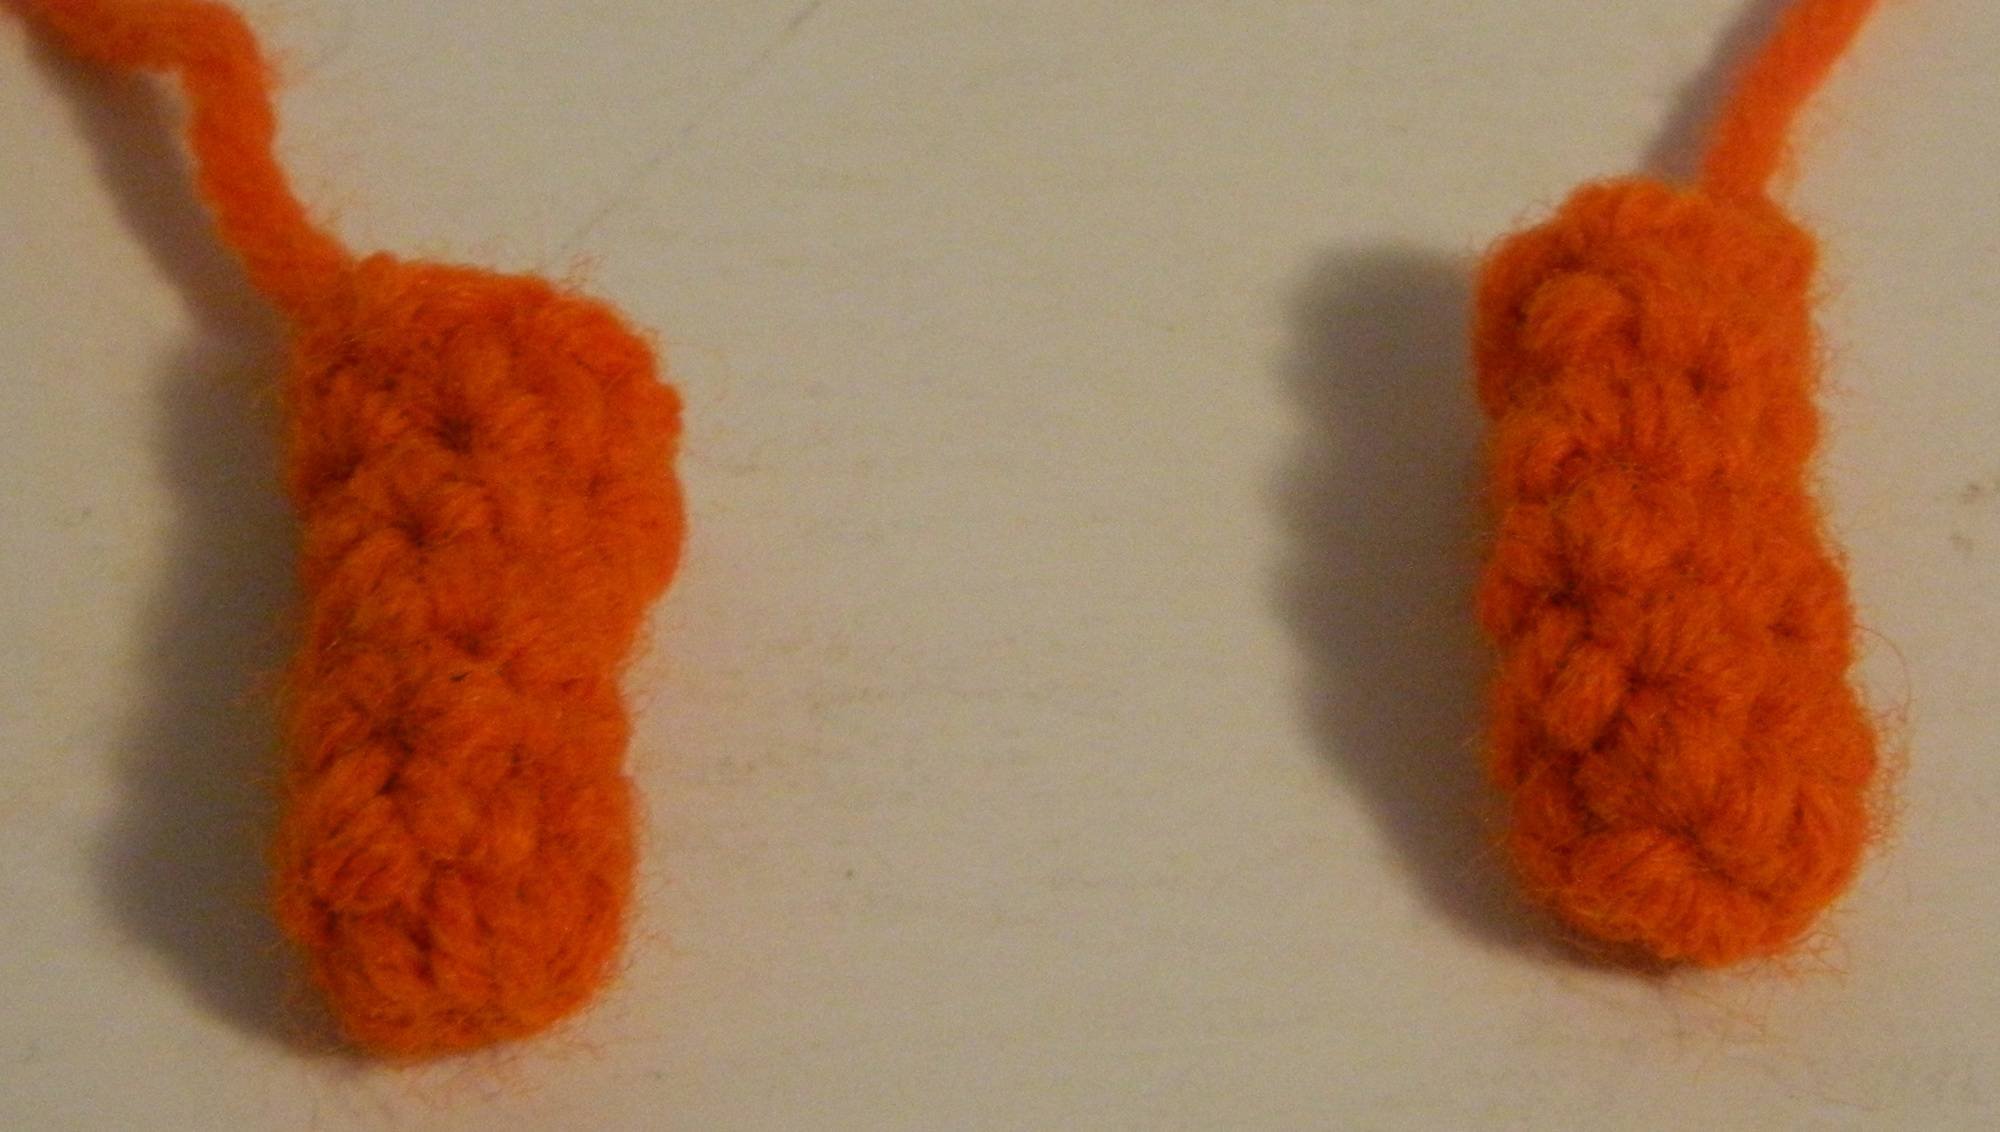
Tops
For the tops you will be using the darker orange yarn. You have to make two tops.
Round 1: CH x 2 (2 stitches)
Round 2: SC x 6 in the first CH (6 stitches)
Rounds 3-7: SC x 6 (6 stitches)
Fasten off leaving enough yarn to sew the tops to the body. Add the desired amount of stuffing to the tops.
Assembly
To assemble the Tempura you need to add the two tops to the top of the body.
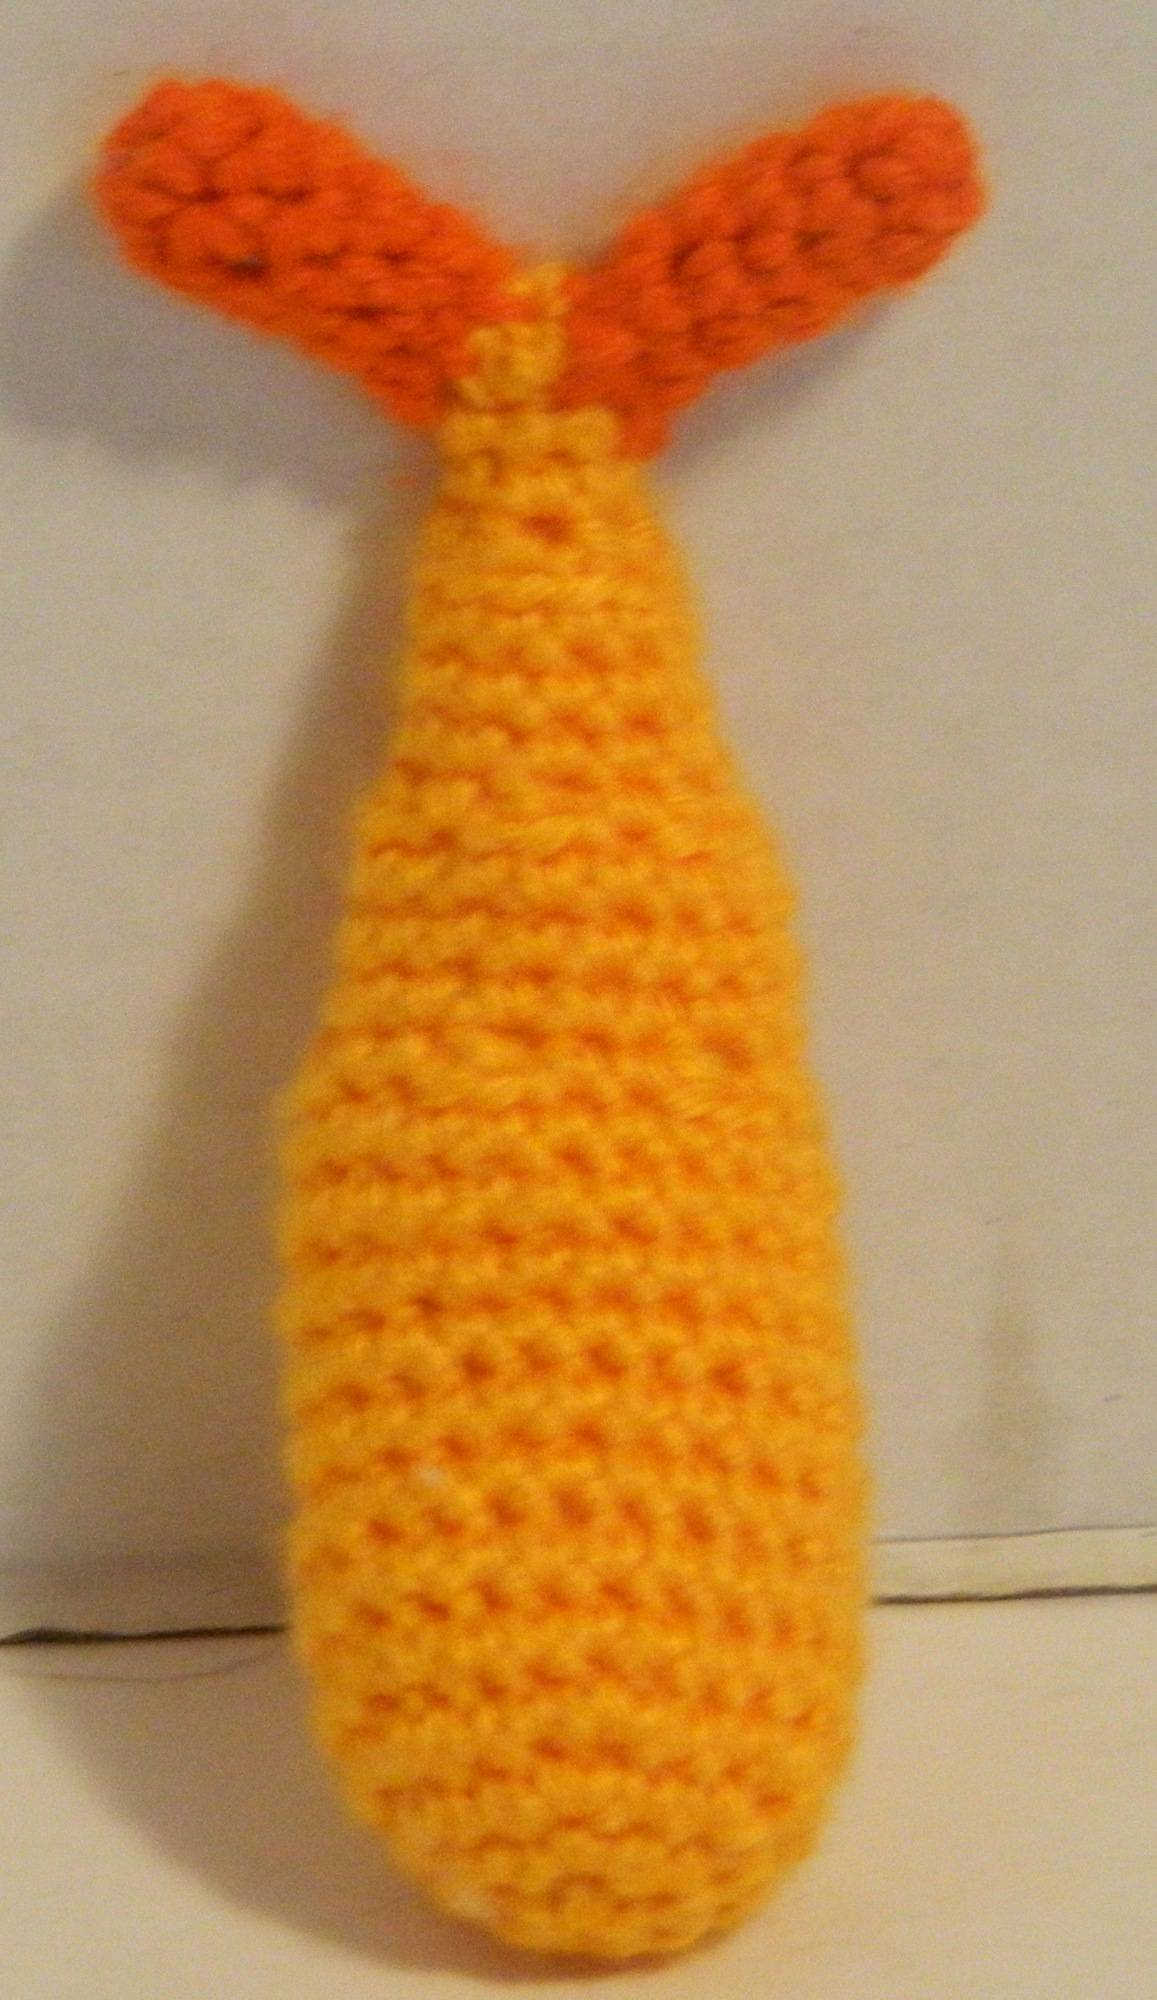
Create the facial features of the tempura using the red and black felt. Use the felt glue to glue them onto the body.

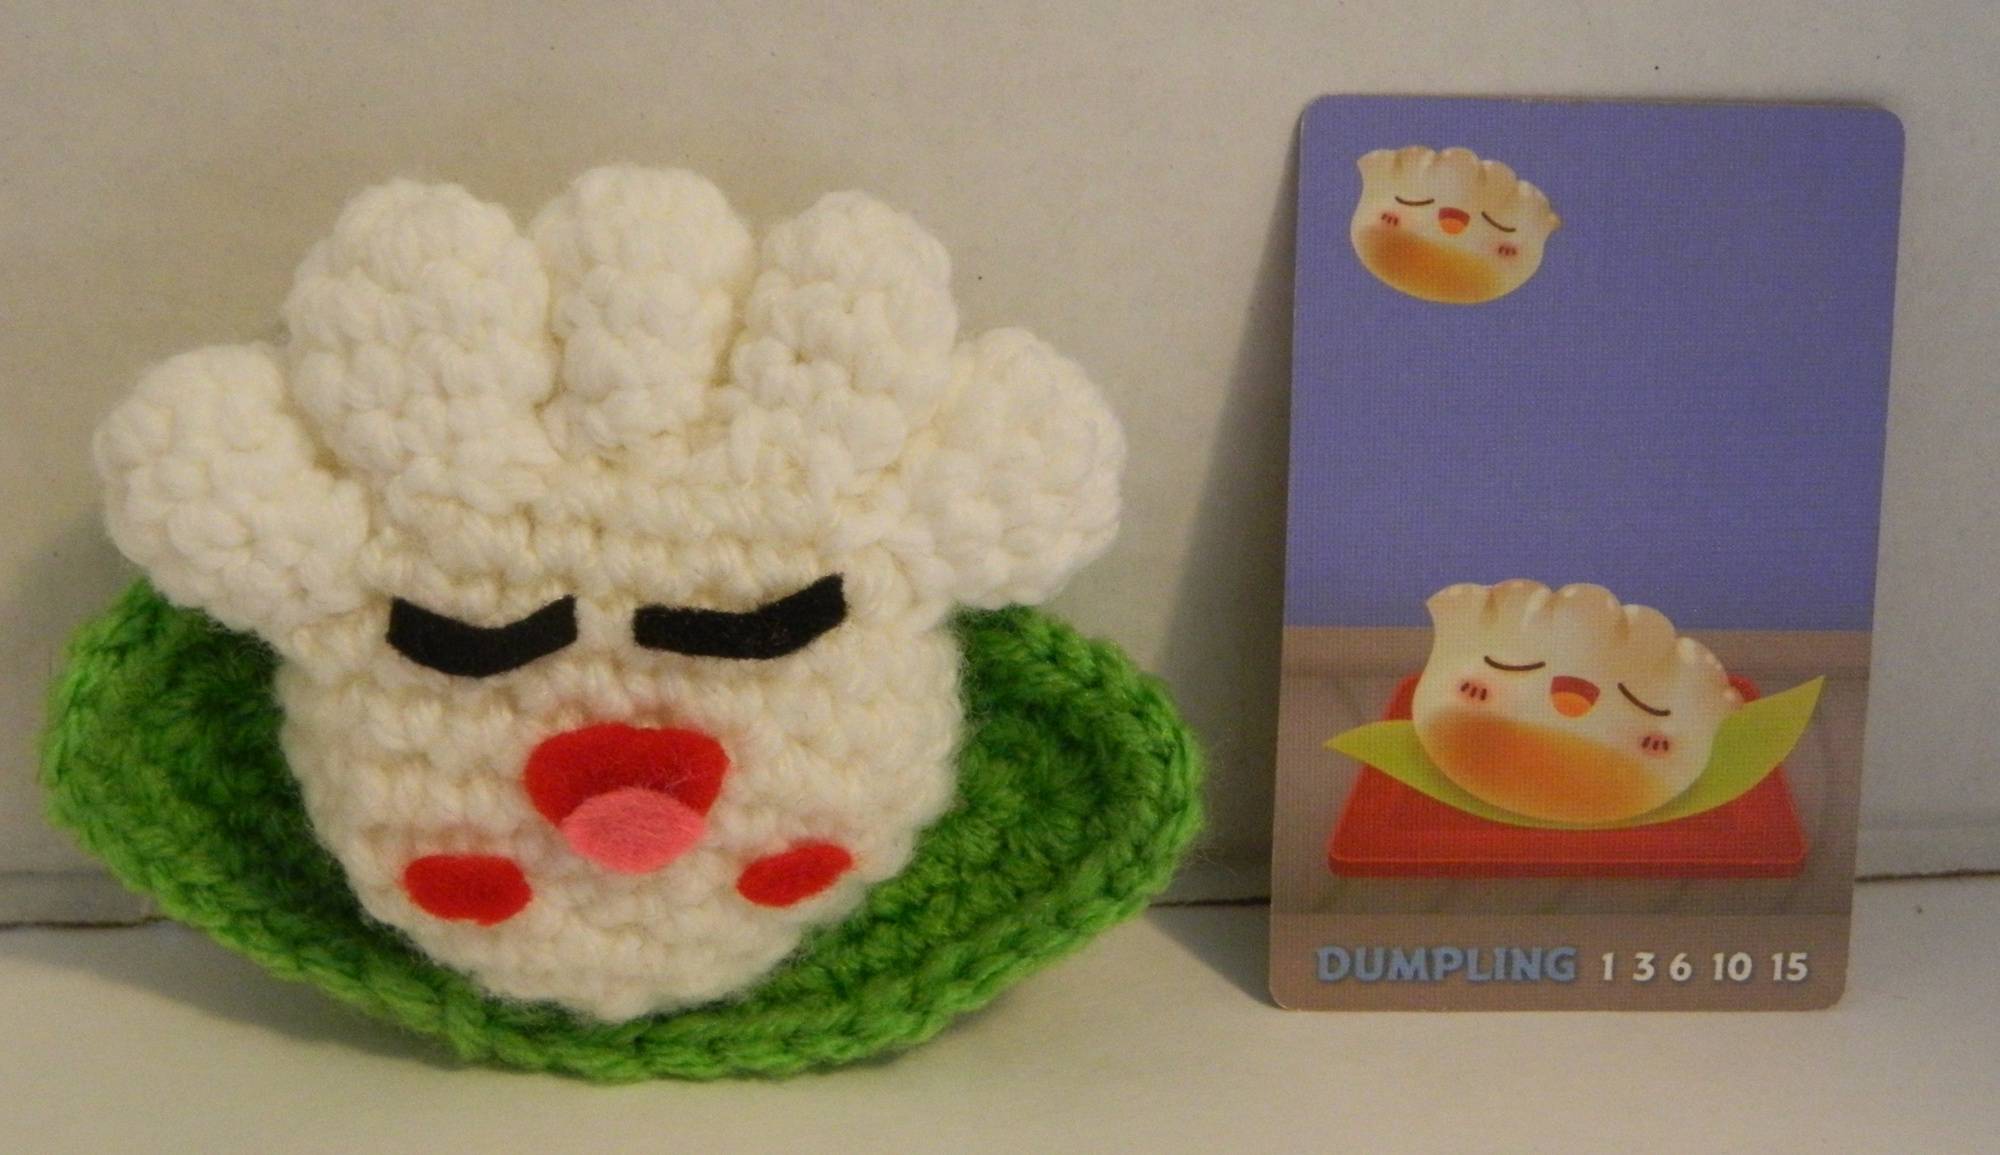
Dumpling

Body
For the body you will use the white yarn.
Round 1: CH x 2 (2 stitches)
Round 2: SC x 6 in the first CH (6 stitches)
Round 3: INC x 6 (12 stitches)
Round 4: | INC x 2, SC x 4 | x 2 (16 stitches)
Round 5: SC, INC x 2, SC x 6, INC x 2, SC x 5 (20 stitches)
Round 6: SC x 2, INC x 2, SC x 8, INC x 2, SC x 6 (24 stitches)
Rounds 7-11: SC x 24 (24 stitches)
Round 12: DEC x 12 (12 stitches)
Round 13: DEC x 6 (6 stitches)
Round 14: SL (1 stitch)
Fasten off, add the desired amount of stuffing, and sew up the hole.

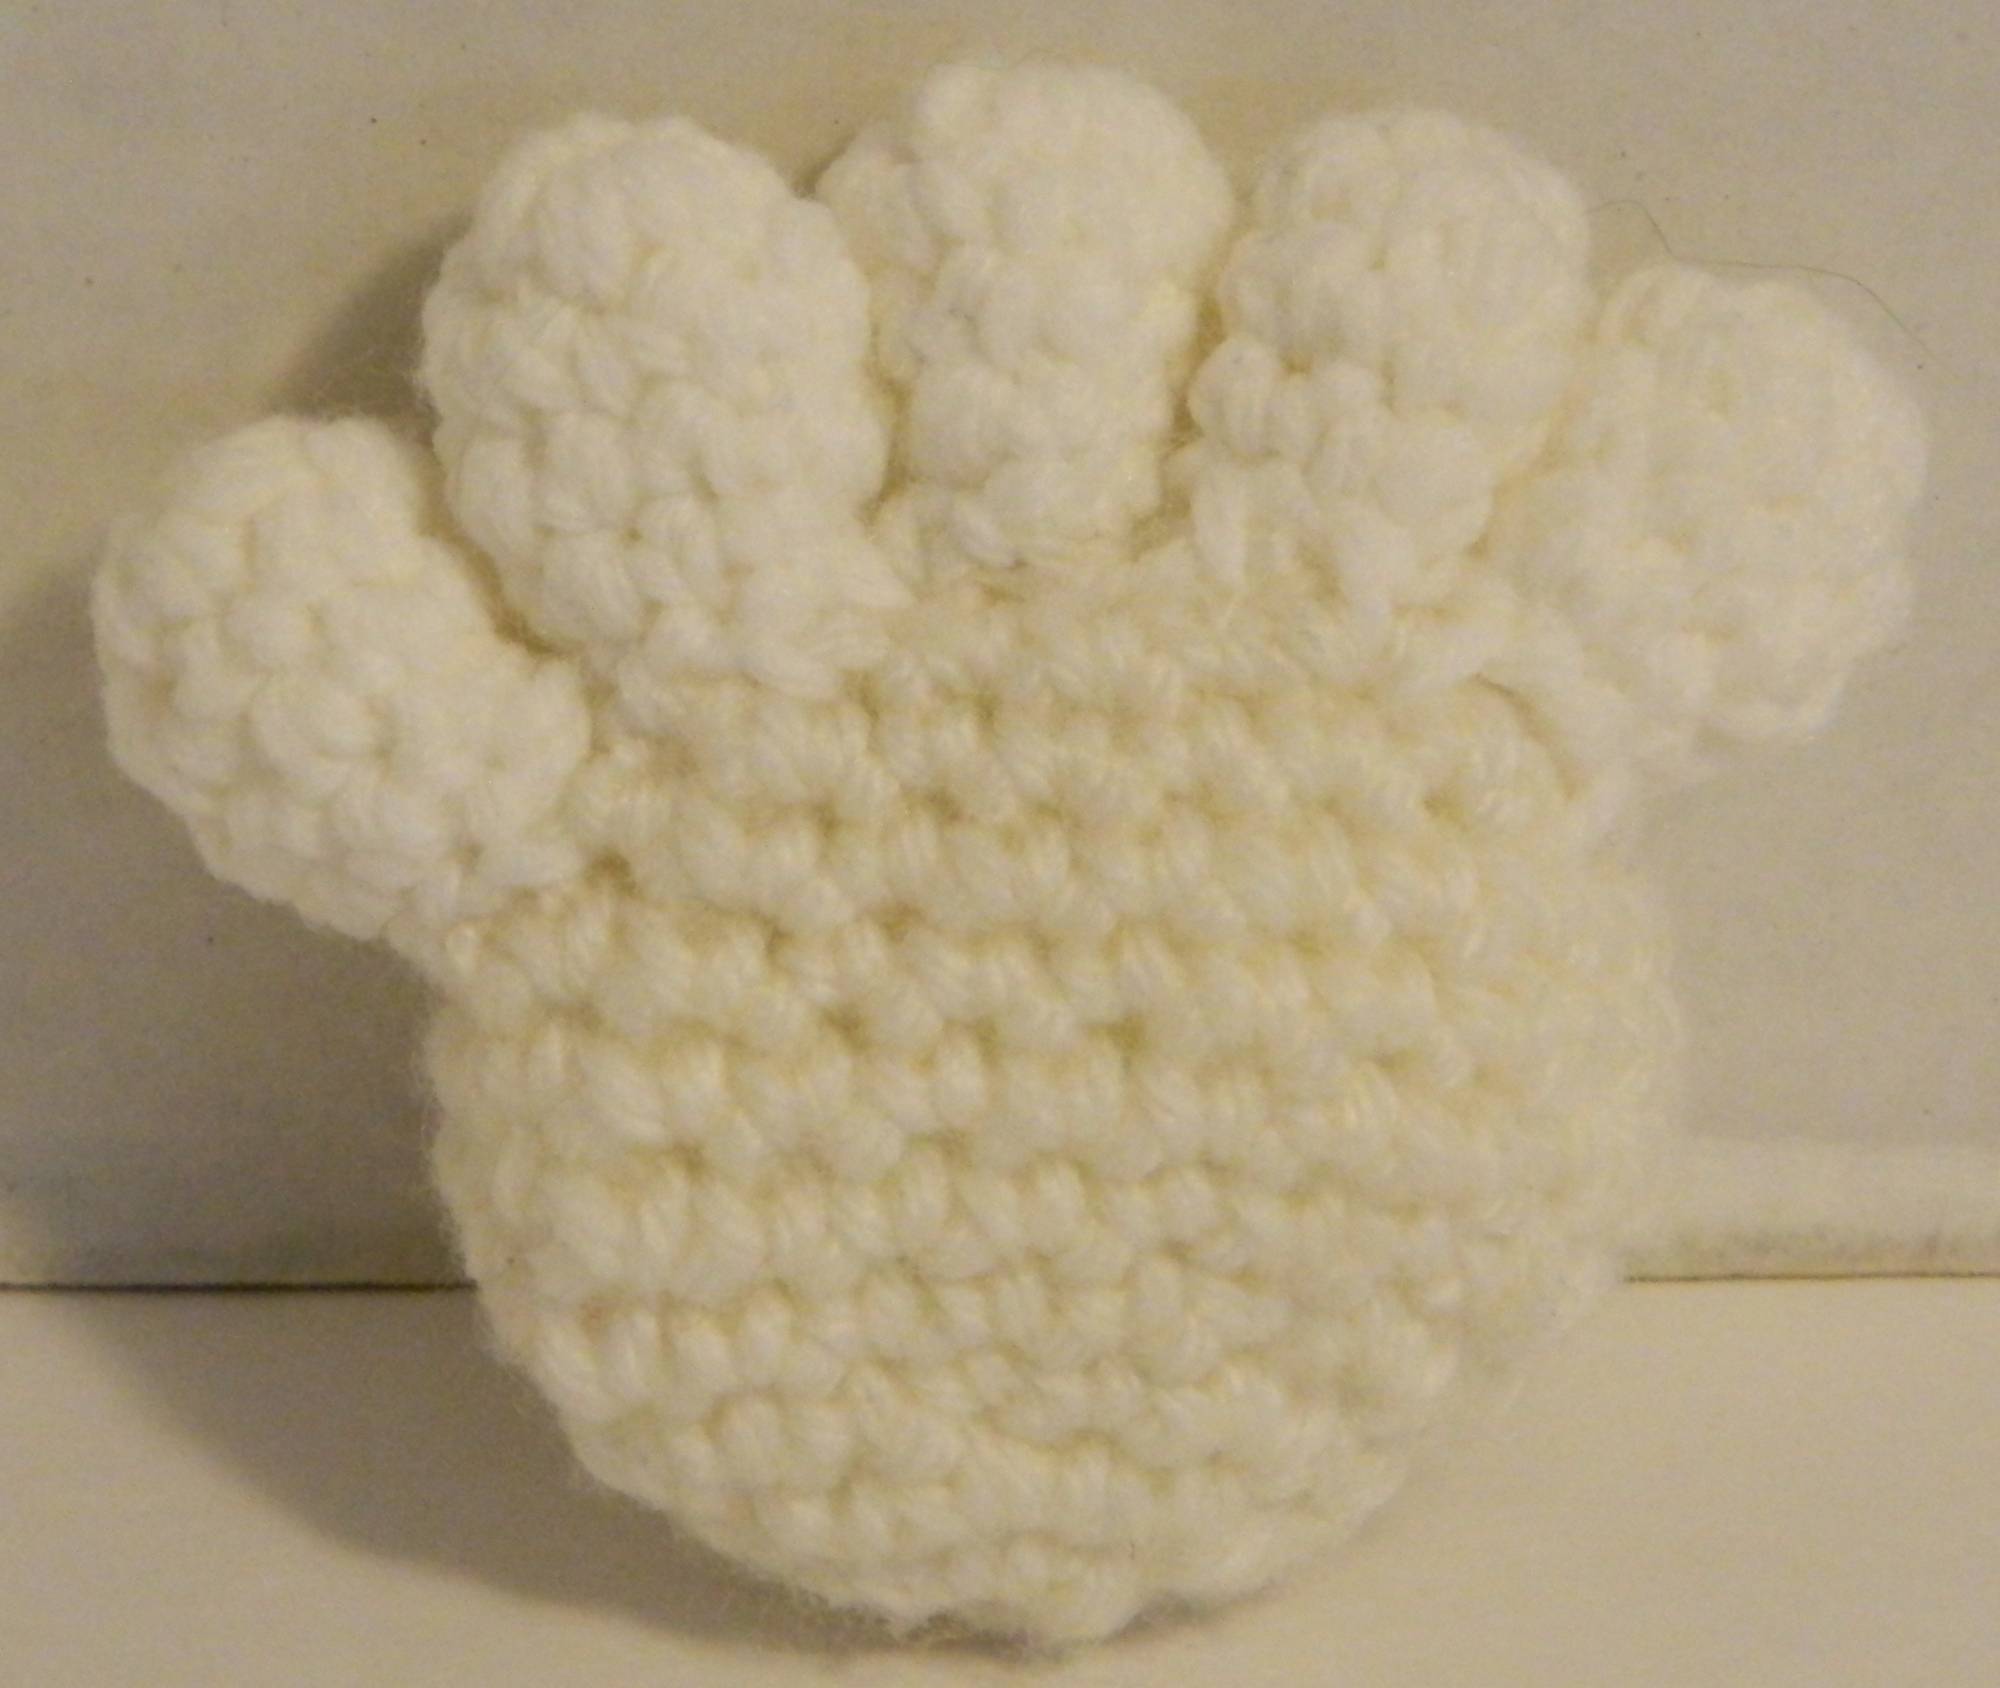
Bumps
You will use the white yarn to make five bumps.
Round 1: CH x 2 (2 stitches)
Round 2: SC x 6 in the first CH (6 stitches)
Round 3: | 3INC, SC x 2 | x 2 (10 stitches). A 3INC is the same as an INC except you use three stitches instead of two stitches.
Rounds 4-5: SC x 10 (10 stitches)
Round 6: SL (1 stitch)

Leaf
For the leaf you will be using the green yarn.
Round 1: CH x 2 (2 stitches)
Round 2: SC x 6 in the first CH (6 stitches)
Round 3: | 4INC, SC x 2 | x 2 (12 stitches). A 4INC is the same as an INC except that it uses four stitches instead of two.
Round 4: SC x 2, 4INC, SC x 5, 4INC, SC x 3 (18 stitches)
Round 5: SC x 4, 4INC, SC x 8, 4INC, SC x 4 (24 stitches)
Round 6: SC x 6, 4INC, SC x 11, 4INC, SC x 5 (30 stitches)
Round 7: SC x 8, 4INC, SC x 14, 4INC, SC x 6 (36 stitches)
Round 8: SC x 10, 4INC, SC x 17, 4INC, SC x 7 (42 stitches)
Round 9: SL (1 stitch)
Fasten off leaving enough yarn to sew the leaf to the body.
Assembly
The first thing to do to assemble the dumpling is sew on the bumps.
Then I sewed the leaf to the back of the dumpling.

Finally I created the face for the dumpling. I used the red, pink and black felt. I used the felt glue to glue them onto the amigurumi.